

1. Lab Environment:
CentOS 5.x
Varnish 2.0.6
2. Installation Steps:
1. Install YUM repository and software:
Note: EPEL is a YUM update repository in Linux systems. Sometimes when packages cannot be found via YUM, installing EPEL can help locate the relevant packages.
#yum install epel-release
#yum install varnish
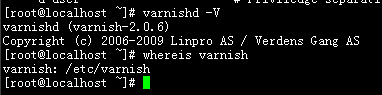
After installation, you can check Varnish information with the following method:
2. Configure and start Varnish:
Before starting, create the necessary directories for the startup process:
#/usr/sbin/groupadd www -g 444
#/usr/sbin/useradd -u 444 -g www www
#mkdir -p /var/vcache
#chmod +w /var/vcache
#chown -R www:www /var/vcache
Note: The created directories will be used later, such as for log directories, working directories, etc. The GID 444 can be any value as long as it does not conflict with other system users.
After installation, run:
ls /etc/varnish
#This is a basic VCL configuration file for varnish. See the vcl(7)#man page for details on VCL syntax and semantics.
#
#Default backend definition. Set this to point to your content
#server.
#
backend default {
.host = “192.168.20.211”;
.port = “80”;
}acl purge {
“localhost”;
“127.0.0.1”;
“192.168.20.0”/24;
}sub vcl_recv {
if (req.request == “PURGE”) {
if (!client.ip ~ purge) {
error 405 “Not allowed.”;
}
lookup;
}if (req.http.host ~ “^www.abc.com”) {
set req.backend = default;
if (req.request != “GET” && req.request != “HEAD”) {
pipe;
}
else {
lookup;
}
}
else {
error 404 “Cache Server”;
lookup;
}
}sub vcl_hit {
if (req.request == “PURGE”) {
set obj.ttl = 0s;
error 200 “Purged.”;
}
}sub vcl_miss {
if (req.request == “PURGE”) {
error 404 “Not in cache.”;
}
}sub vcl_fetch {
if (req.request == “GET” && req.url ~ “/.(txt|js)$”) {
set obj.ttl = 3600s;
}
else {
set obj.ttl = 30d;
}
}
After completing the edits, save it as vcl.conf and place it in the /etc/varnish directory.
Attachment download: https://www.cnop.net/uploadfile/2016/0110/20160110093633817.zip
Configuration file explanation:
(1) Varnish proxies requests to the backend web server at IP 192.168.20.211 on port 80;
(2) Varnish allows the three source IPs localhost, 127.0.0.1, and 192.168.20.*** to clear cache using the PURGE method;
(3) Varnish processes requests for the domain www.abc.com; requests for non-www.abc.com domains return “Cache Server”;
(4) Varnish caches HTTP GET and HEAD requests, and passes through POST requests, allowing them to go directly to the backend web server. This is configured because POST requests typically send data to the server that needs to be received and processed, so caching is not applied;
(5) Varnish sets a cache time of 1 hour for URLs ending with .txt or .js, and 30 days for all other URLs.
Start Varnish:
#/usr/sbin/varnishd -n /var/vcache -f /etc/varnish/vcl.conf -a 0.0.0.0:80 -s file,/var/vcache/varnish_cache.data,1G -g www -u www -w 30000,51200,10 -T 127.0.0.1:3500 -p client_http11=on
Note: -n specifies the working path.
Start varnishncsa to write Varnish access logs to a log file:
Run:
#whereis varnishncsa
You can see the default installation path of varnishncsa:

Start log recording:
/usr/bin/varnishncsa -n /var/vcache -w /var/logs/varnish.log &
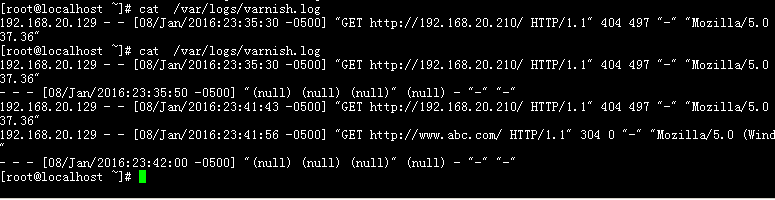
Viewing the log, you can see:
Configure Varnish to start automatically on boot:
#vi /etc/rc.local
Content is as follows:
/usr/sbin/varnishd -n /var/vcache -f /etc/varnish/vcl.conf -a 0.0.0.0:80 -s file,/var/vcache/varnish_cache.data,1G -g www -u www -w 30000,51200,10 -T 127.0.0.1:3500 -p client_http11=on
/usr/bin/varnishncsa -n /var/vcache -w /var/logs/varnish.log &