

The Hyper-V feature was previously available only in server editions of Windows. With the Win8 era, Microsoft brought it into the Windows 8 operating system. Hyper-V is a great choice for those eager to try newly leaked ISOs without installing them on physical machines. Here is a simple guide on how to use it — hope it helps.
Part 1. Enabling Hyper-V
The Hyper-V feature is only available in Windows 8 Pro and Enterprise editions and is not enabled by default. Enabling it is quite simple.
Right-click on the bottom-left corner of the desktop, select “Programs and Features,” then in the window that appears, click “Turn Windows features on or off.” In the window shown below, check Hyper-V and click “OK.”
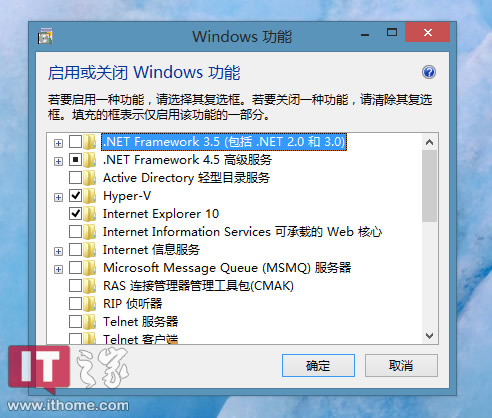
After clicking “OK” and restarting twice as prompted by the system, you will see the Hyper-V link on the Start screen.
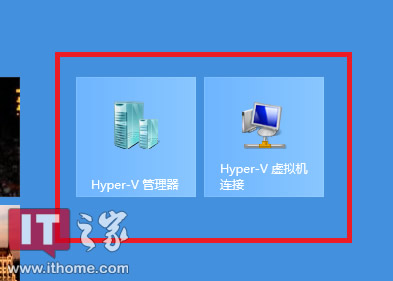
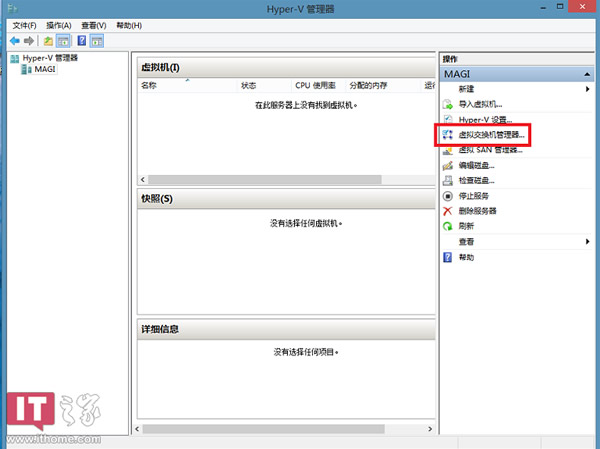
Click “Hyper-V Manager” to open the main interface of Hyper-V Manager, which looks like the screenshot below.
Part 2. Setting Up a Virtual Switch
Hyper-V virtual machines can access the host’s network resources. If you do not need network access, you can skip this step.
Open Hyper-V Manager from the Start screen, then click “Virtual Switch Manager” highlighted in the red box in the image above to begin creating a virtual switch. Once opened, the interface looks like the screenshot below.
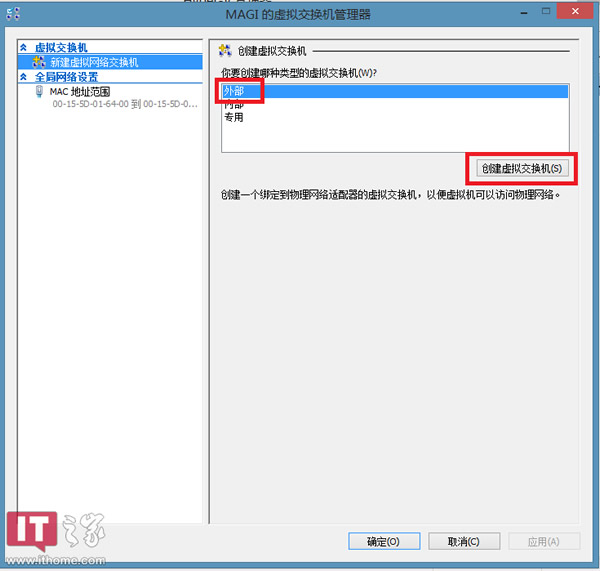
Taking external network access as an example, click “External” then “Create Virtual Switch” in sequence, and you will be automatically redirected to the page shown below.
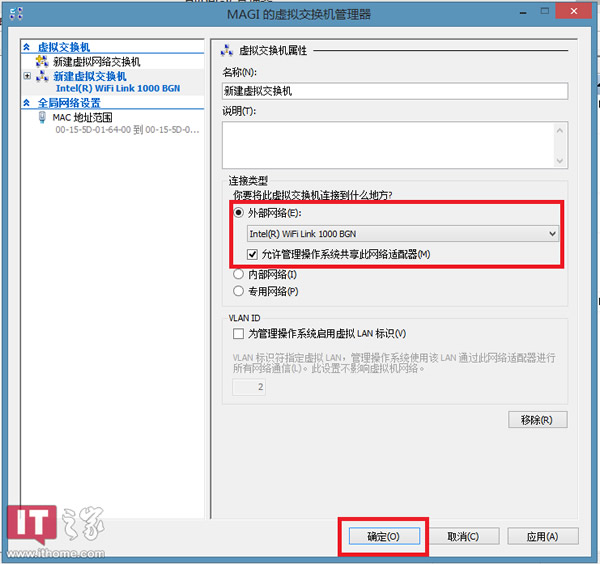
From the “External network” dropdown menu, select the device that can access the external network and click “OK.” You will then see a prompt dialog as shown below — select “Yes.”
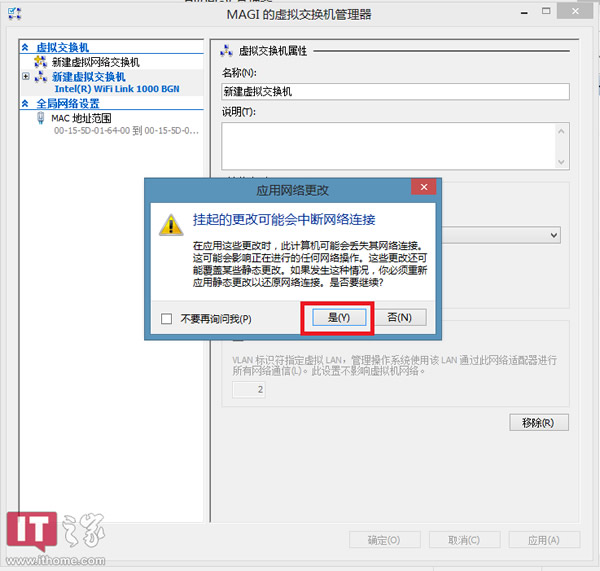
With that, the virtual switch setup is complete. Next up… it is not the moment of miracles, but the moment of creating a virtual machine.
Part 3. Creating a Virtual Machine
Return to the Hyper-V main interface and begin creating a virtual machine. Click “New” then “Virtual Machine” as shown in the image below to start the creation process.
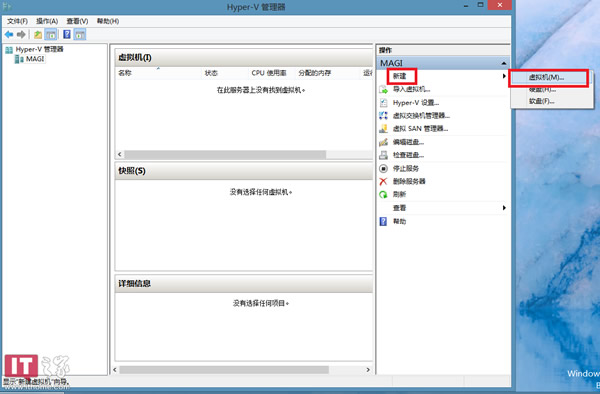
If you have used VirtualBox or VMware before, the following steps should feel familiar.
Step 1, “Before You Begin”
You will see an introduction screen as shown below — click “Next.”
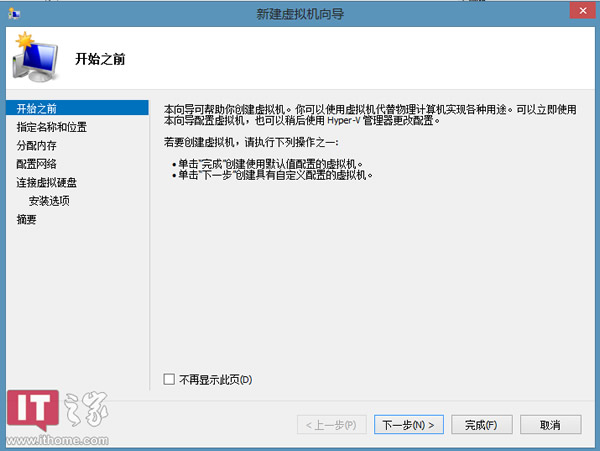
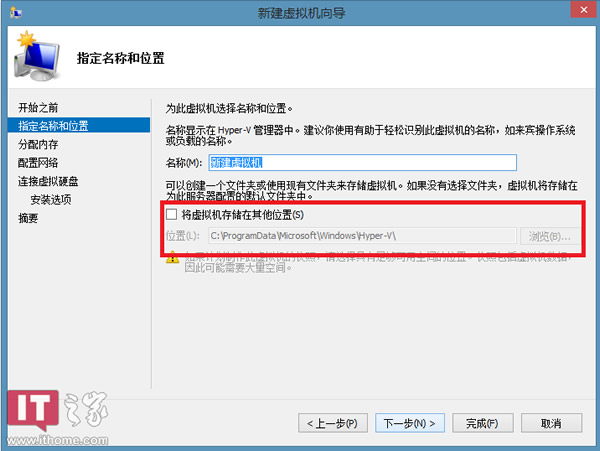
Step 2, “Specify Name and Location”
In the screen shown below, enter a virtual machine name you like. If you want to change the storage location, check the box highlighted in the red frame and choose a custom path.
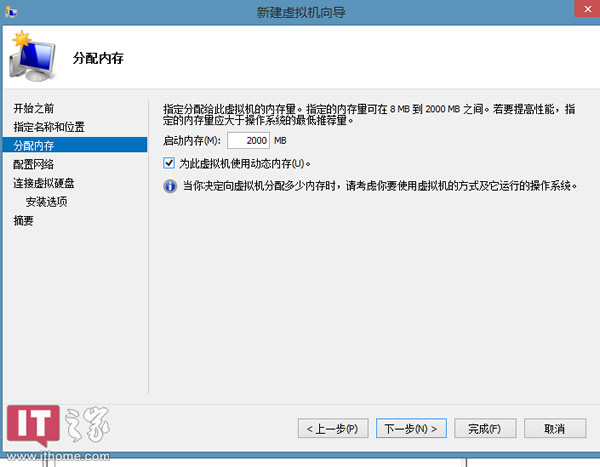
Step 3, “Assign Memory”
Enter an appropriate memory size — no less than 1 GB for 32-bit systems and no less than 2 GB for 64-bit systems. It is also recommended to check “Use Dynamic Memory.”
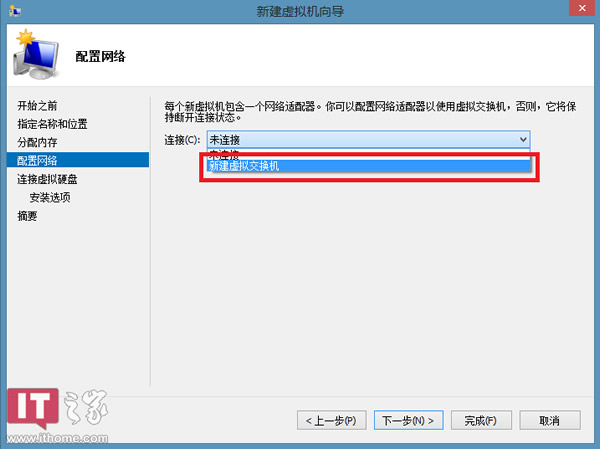
Step 4, “Configure Networking”
If you created a virtual switch earlier, select it here; otherwise, proceed with the default settings.
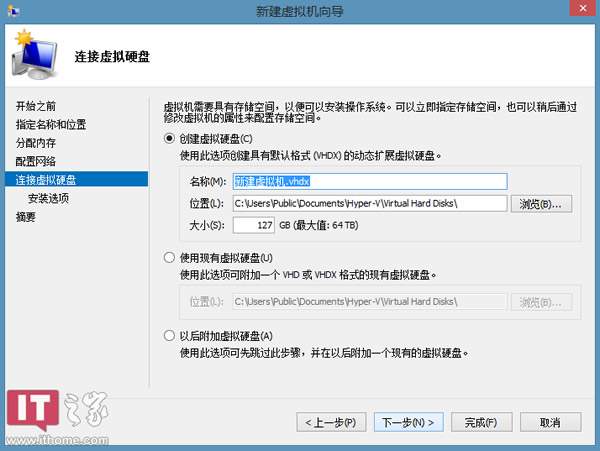
Step 5, “Connect Virtual Hard Disk”
Select “Create a virtual hard disk,” then name it and choose a storage location. If you already have a VHD virtual hard disk created previously, you can also select “Use an existing virtual hard disk.”
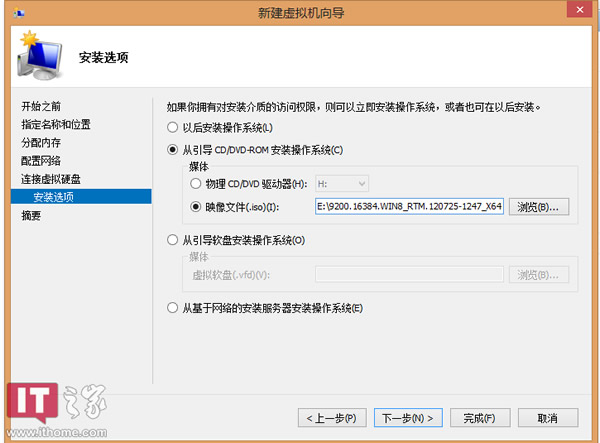
Step 6, “Installation Options”
You can choose “Install an operating system later,” “Install an operating system from a CD/DVD-ROM,” or other options. Here we take installing from an image file as an example.
Step 7, “Summary”
This page shows a summary of the basic information for the virtual machine you just configured.
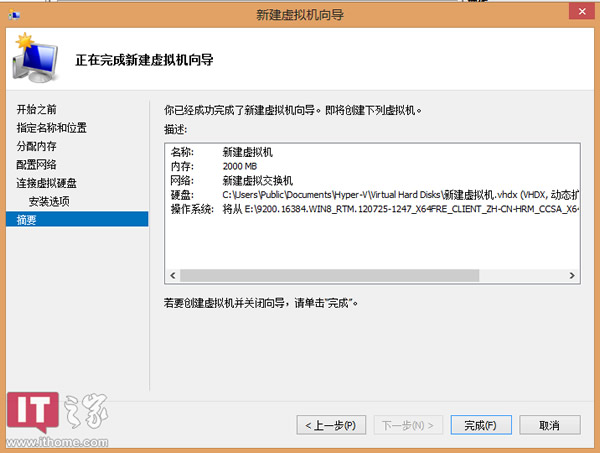
Click Finish and the system will automatically begin creating the virtual machine. Once creation is complete, you will see the newly created virtual machine in the Hyper-V main interface.
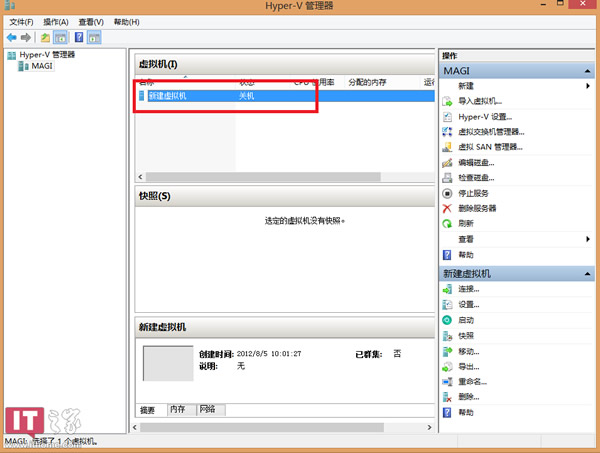
Double-click the newly created virtual machine to begin installing the operating system.
Finally, here is a sample screenshot for reference.