

How to Set Up a Router in Windows 7 is a topic many users care about, as the growing number of people using Windows 7 has made internet setup issues increasingly complicated. Below, we explain the step-by-step process of setting up a router on a Windows 7 system:
Note: This method is only applicable to settings after the router has been installed.
① Open your browser and enter 192.168.1.1. A prompt will appear
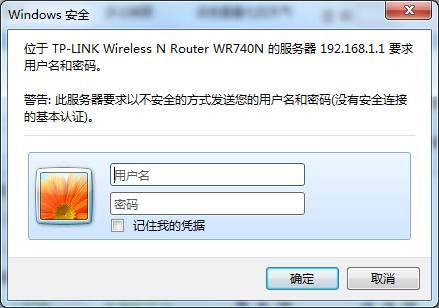
Enter the username admin and password admin
② After entering a new router, the router setup interface will appear
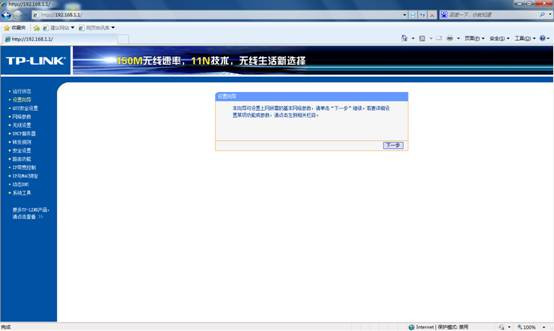
③ Choose your internet connection type and click Next
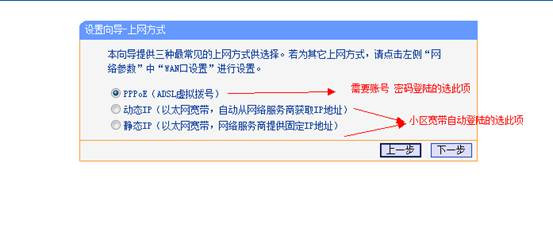
④ Click Next, enter your internet account information, and click Next
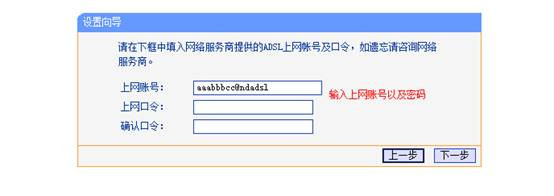
⑤ Enter the wireless settings and click Next
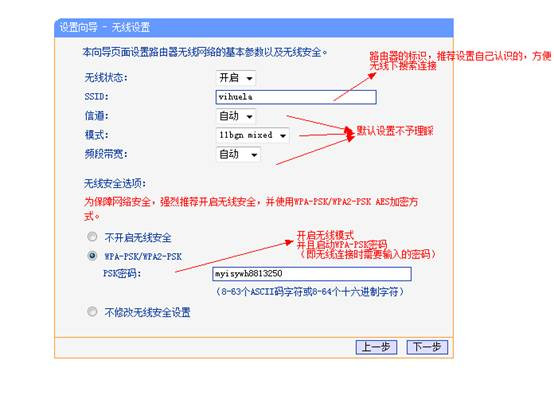
⑥ Minimize the browser
Since most routers have the DHCP function enabled, you need to configure the settings on your computer:
In the bottom-right corner of Windows 7

Right-click to open the Network and Sharing Center
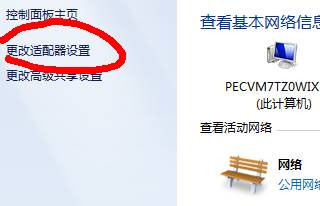
Local Area Connection properties
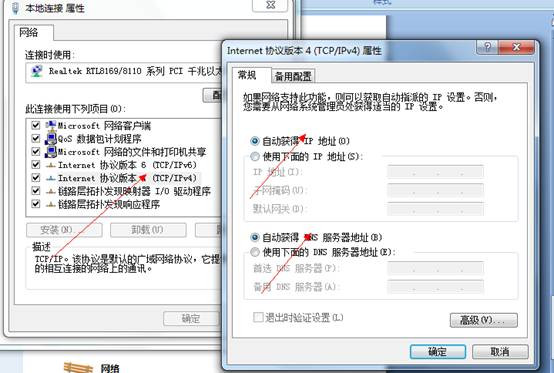
For Windows XP, go to Network Neighborhood properties, then network connections. Similarly, set the IP acquisition method to automatic in the Local Area Connection settings.
⑦ Go back to your browser and click Finish
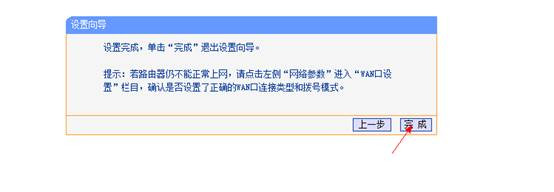
The problem of how to set up a router in Windows 7 is now solved. If you still don’t know how to set up a router, give it a try now. It’s actually very simple—just a few steps and you can get online easily.
【Editor’s Picks】
- How to Set Up a Router to Reduce the Impact of Thunder Downloads
- How to Set Up a Router for CNC Broadband
- How to Set a Router Password
- Five Classic Ways to Cleverly Configure Your Router
- Huawei 3COM Practical Tips — How to Set a Router Password
- Step-by-Step Router Setup Guide with Illustrations
- Router Setup: Fixing the 192.168.1.1 Login Failure