

1. Check If Apache Supports mod_rewrite
Use PHP’s phpinfo() function to view the environment configuration. Press Ctrl+F and search for “Loaded modules,” which lists all modules enabled for apache2handler. If “mod_rewrite” is included, it is already supported, and no further setup is needed.
If “mod_rewrite” is not enabled, open the httpd.conf file located in your Apache installation directory “/apache/conf/”. Press Ctrl+F and search for “LoadModule rewrite_module,” then delete the ”#” sign at the beginning of that line.
If it is not found, go to the “LoadModule” section and add the line “LoadModule rewrite_module modules/mod_rewrite.so” (must be on its own line) at the end, then restart the Apache server.
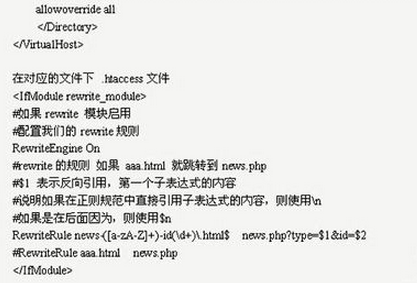
2. Enable .htaccess Support in Apache Server
Modify the httpd.conf file
Options FollowSymLinksAllowOverride None
Change to
Options FollowSymLinksAllowOverride All
Note: Besides setting the above, you must also configure the following (many online resources miss this part), otherwise your configuration will fail. Change the parameter after DocumentRoot to your local website directory. For example, if your site’s root directory is D:/web/, set it as DocumentRoot "D:/web/" — meaning you must modify the current directory.
After completing this step, you must restart the Apache server for the changes to take effect.
3. Create the .htaccess File
Create a new file named htaccess.txt, open it with Notepad, click File > Save As, enter ”.htaccess” in the file name box, and then click Save. This file must be saved in the root directory of your website.。
4. Add URL Rewrite Rules (in the website root directory)