

Finally got a smartphone and laptop, but no Wi-Fi? Dreaming of surfing the web from the comfort of your bed? A wireless router has become an essential household device, but figuring out how to connect it to the network has become a major headache for many users. After several attempts and installations, I’ve summarized a method for setting up a wireless router on a LAN, and I hope it will be helpful to those who are about to install one.
Step 1: Connecting the Wireless Router
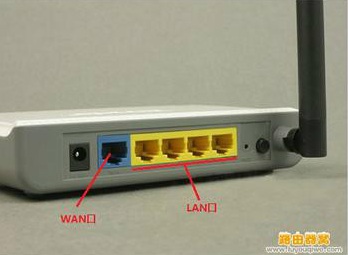
Plug the LAN cable into the “WAN” port of your wireless router. Most routers have several network ports in two different colors — the port whose color differs from the others is the “WAN” port. Using a roughly 1-meter network cable with RJ45 connectors on both ends, plug one end into the network card of the home computer that was previously able to access the internet, and plug the other end into any of the router’s other ports. Power on the wireless router.
The router manual includes an illustrated guide for connecting the wireless router:
Step 2: Computer Settings
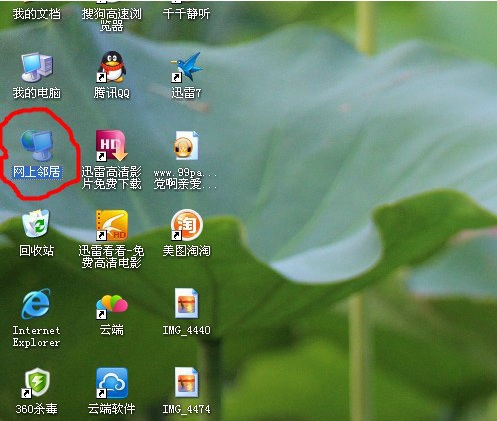
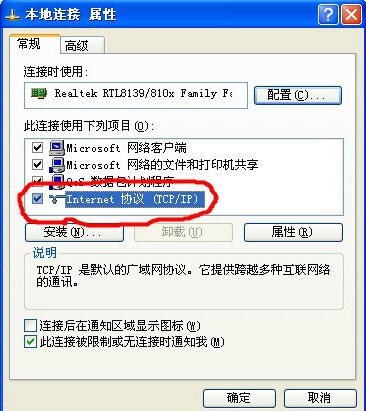
Turn on the home computer you just connected, right-click on “Network Neighborhood” on the desktop, and select “Properties.”
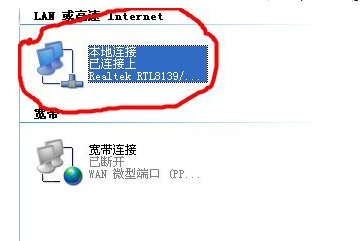
Double-click “Local Area Connection.”
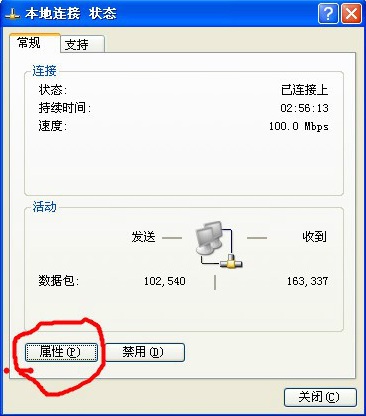
In the window that opens, click “Properties.”
Double-click “Internet Protocol (TCP/IP).”
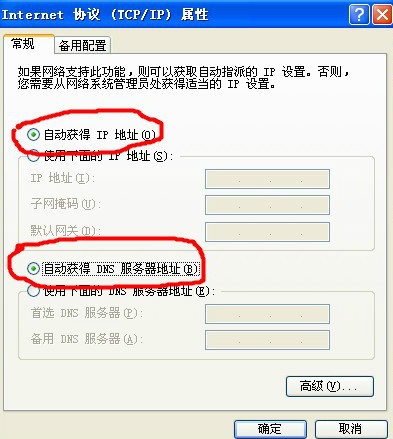
Select “Obtain an IP address automatically” and “Obtain DNS server address automatically.” Then click “OK” to close all windows.
Step 3: Configuring the Wireless Router
Open your browser, type “192.168.1.1” in the address bar, and press “Enter” to access the router login page. Enter the username and password to access the router settings interface (the username and password can be found on the label on the back of the router).

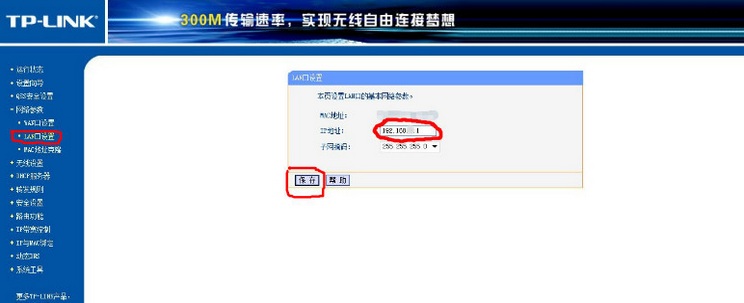
Open “Network Parameters” on the far left of the interface.

First, go to “LAN Settings” and update the IP address to “192.168.*.1” — the * here represents any number, generally a value within 10 will do. Save the settings afterward. At this point, the router will restart; follow the on-screen prompts. If it does not restart automatically, you will need to restart it manually. Then, enter “192.168.*.1” in your browser to log into the router again and proceed with the following settings.
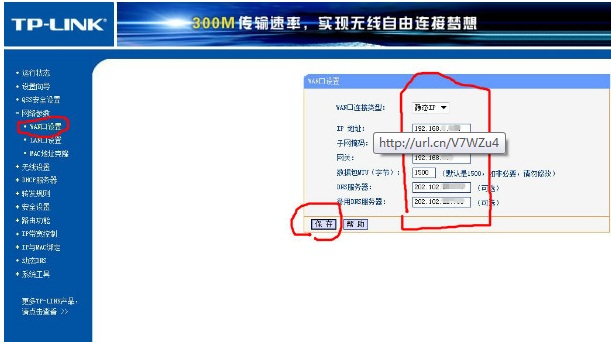
Next, go to “WAN Settings.” On this page, you need to fill in the data that was previously used on your home computer — that is, the IP address and other data assigned to you on the LAN. Save the settings afterward.
If your LAN uses MAC address and IP binding, you will also need to clone your home computer’s MAC address to the router’s MAC settings. Click “Clone MAC Address” — after cloning, the digits in the lower box will be copied to the upper box. Save afterward, and restart the router according to the on-screen prompts.
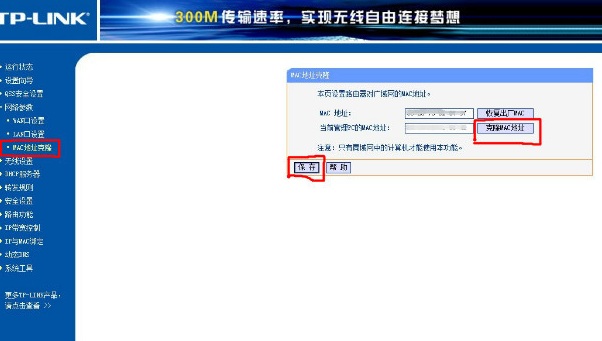
Now let’s set up the wireless router’s name and password.
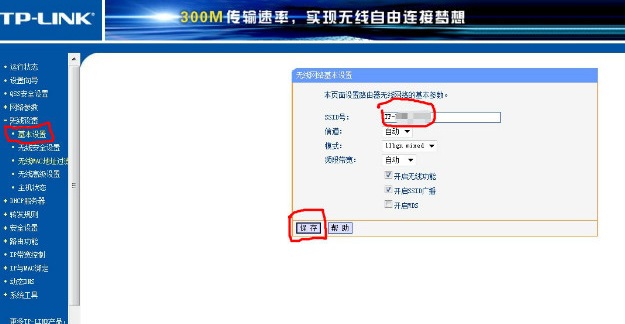
Open “Wireless Settings” on the far left of the interface and click “Basic Settings.” The “SSID” here is the name of your wireless router, which you can set however you like. Save when done. When you later search for signals on your laptop, this is the name that will appear.
Go to “Wireless Security Settings” and enter your password in the “PSK Password” field. Save when done.
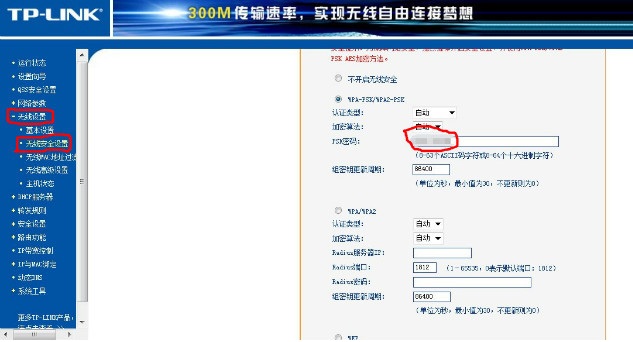
After both the router name and password have been set, the router needs to restart for the changes to take effect.
Open your laptop, select your router, enter the password, and you’re online.
[Editor’s Recommendations]