

<<
This article will show you how to share a printer over the same local area network in Windows 7. After testing, connections work normally between Windows 7 PCs and between Windows 7 and Windows XP.
Step 1: Disable Guest Account Restrictions
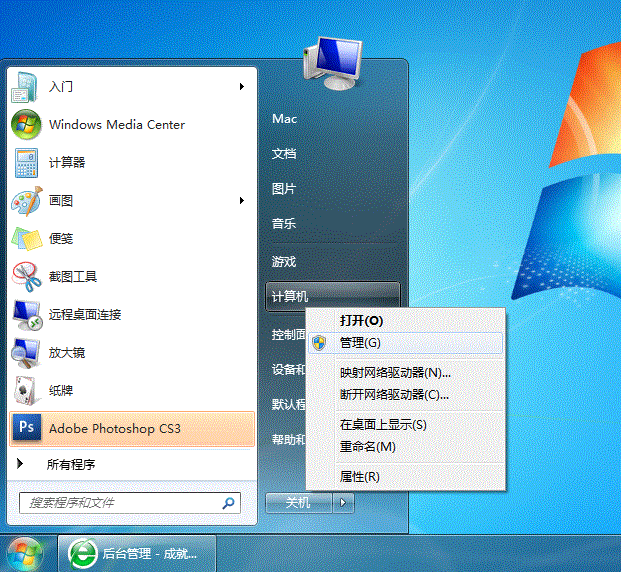
1. Click the [Start] button, right-click on [Computer], and select [Manage], as shown below:
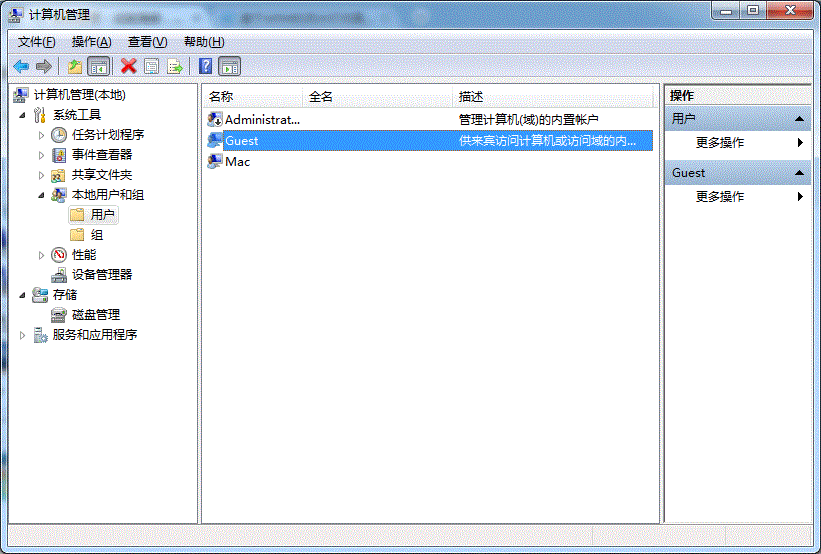
2. In the [Computer Management] window that opens, find the [Guest] user, as shown below:
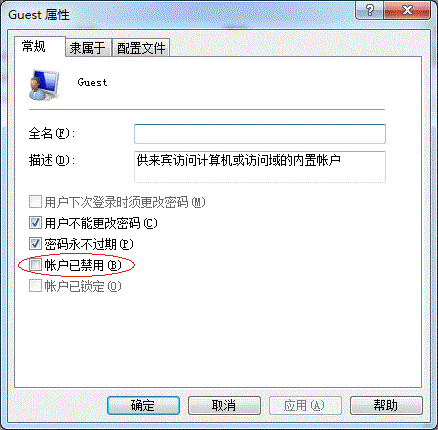
3. Double-click [Guest] to open the [Guest Properties] window and ensure the [Account is disabled] option is unchecked (see below).
Step 2: Share the Target Printer
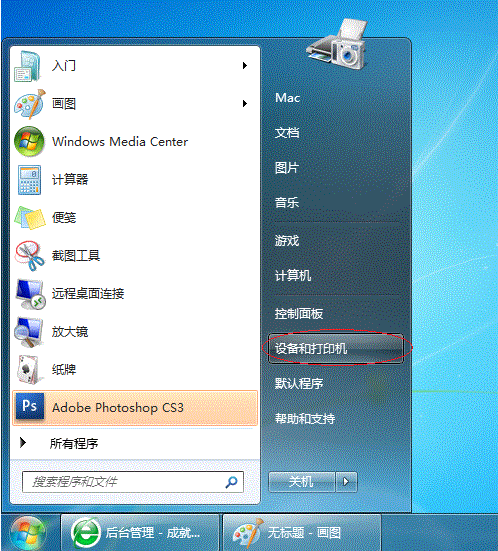
1. Click the [Start] button and select [Devices and Printers], as shown below:
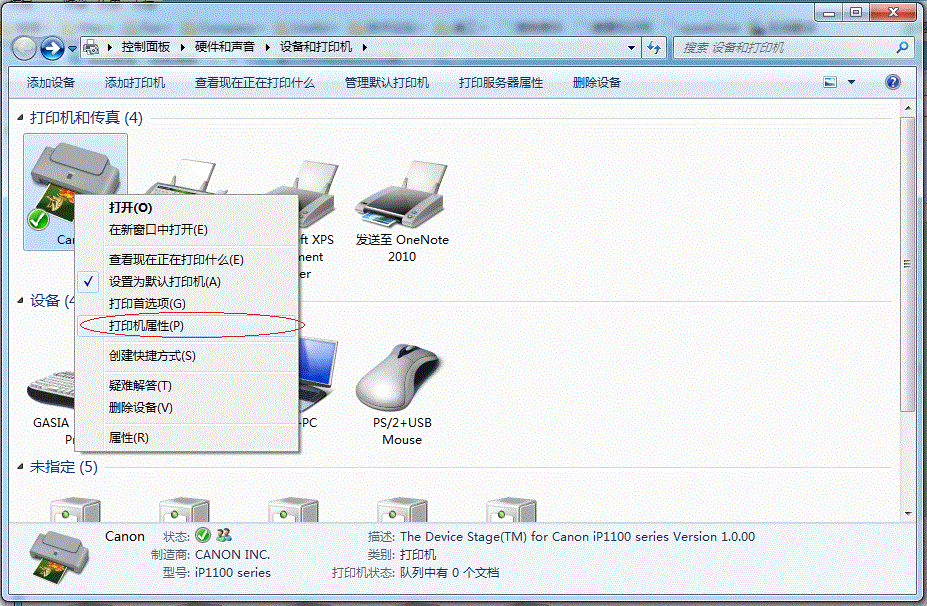
2. In the window that opens, find the printer you want to share (prerequisite: the printer is properly connected and the driver is correctly installed), right-click on the printer, and select [Printer properties], as shown below:
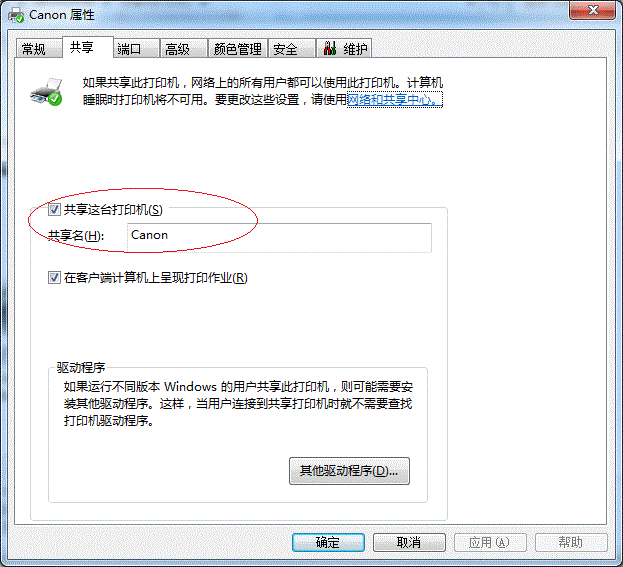
3. Switch to the [Sharing] tab, check [Share this printer], and set a share name (remember this name, as it may be needed later), as shown below:
Step 3: Configure Advanced Sharing Settings
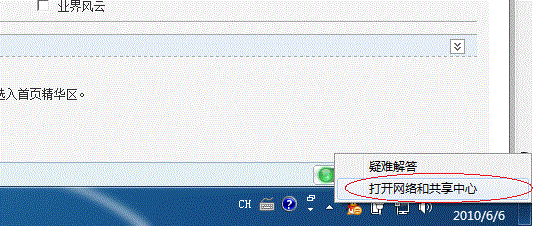
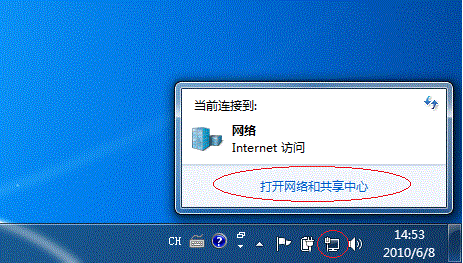
1. Right-click the network connection icon in the system tray and select [Open Network and Sharing Center], as shown below:
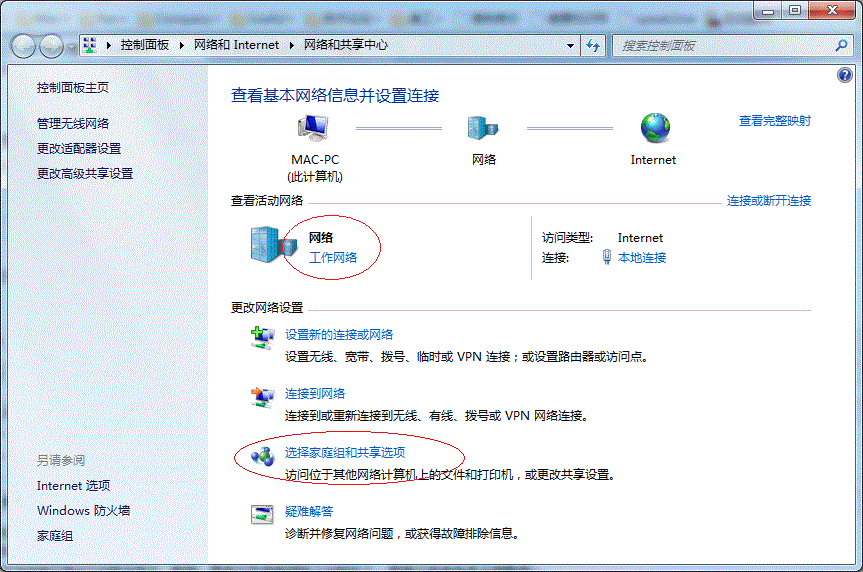
2. Note your network type (mine is a Work network), then click [Choose homegroup and sharing options] in the pop-up window, as shown below:
3. Then click [Change advanced sharing settings], as shown below:
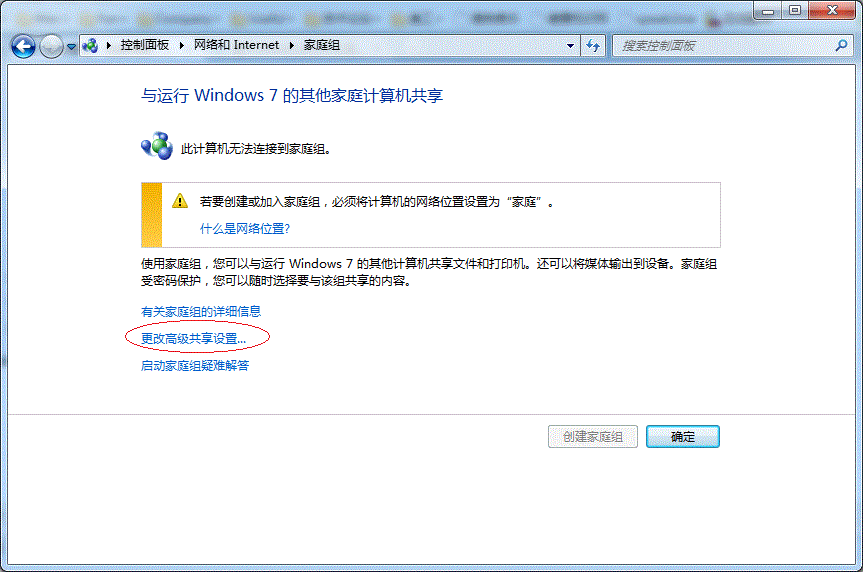
4. If you are on a Home or Work network, refer to the image below for specific [Change advanced sharing settings] configuration. Key options are highlighted with red circles. Don’t forget to save changes after configuring.
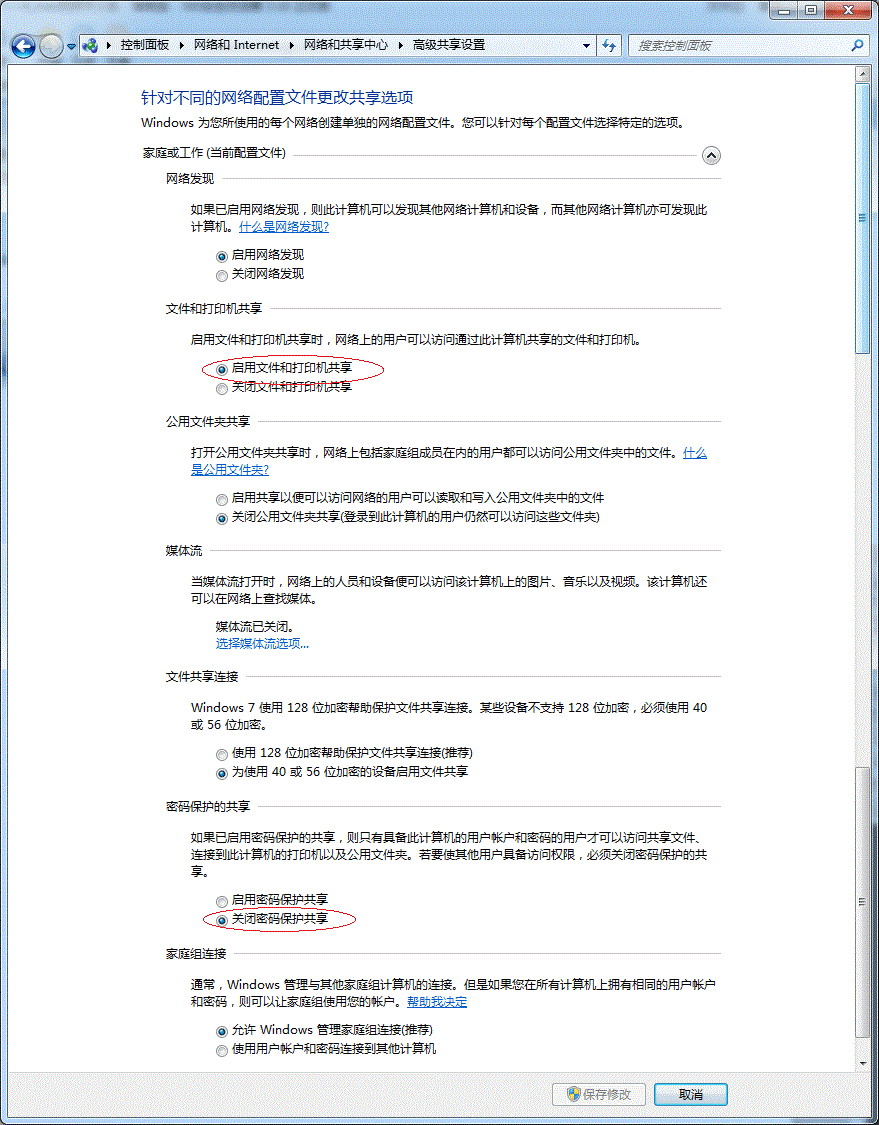
Note: If you are on a Public network, the settings are similar but you should configure the options under [Public] instead of [Home or Work], as shown below: 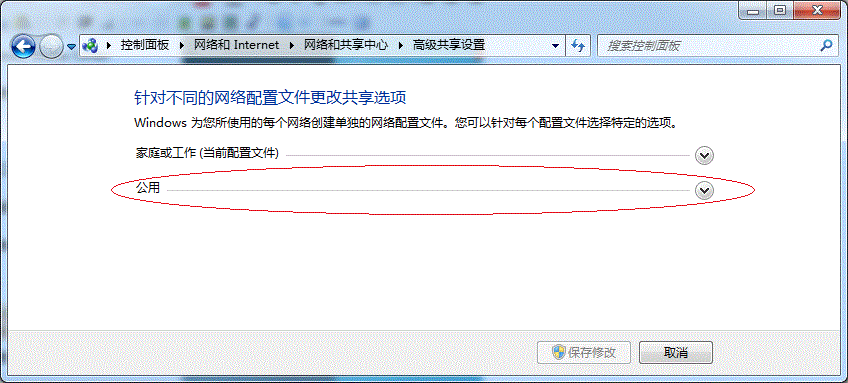
Step 4: Set the Workgroup
Before adding the target printer, first ensure that all computers on the LAN are in the same workgroup. The process is as follows:
1. Click the [Start] button, right-click on [Computer], and select [Properties], as shown below:
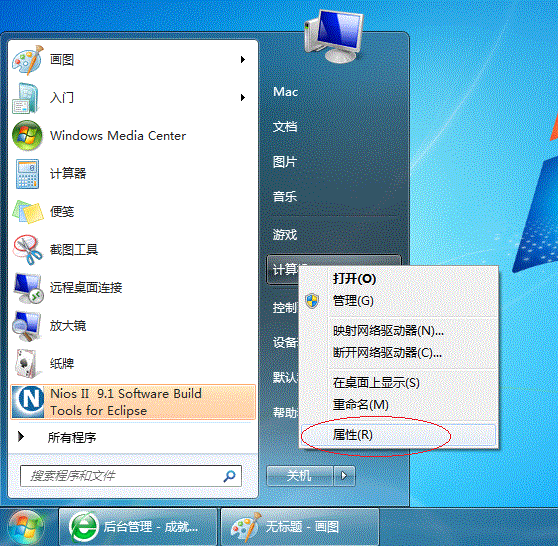
2. In the window that opens, find the workgroup. If the workgroup settings don’t match, click [Change settings]; if they match, you can exit and skip to Step 5.
Note: Remember the [Computer name], as it will be used later.
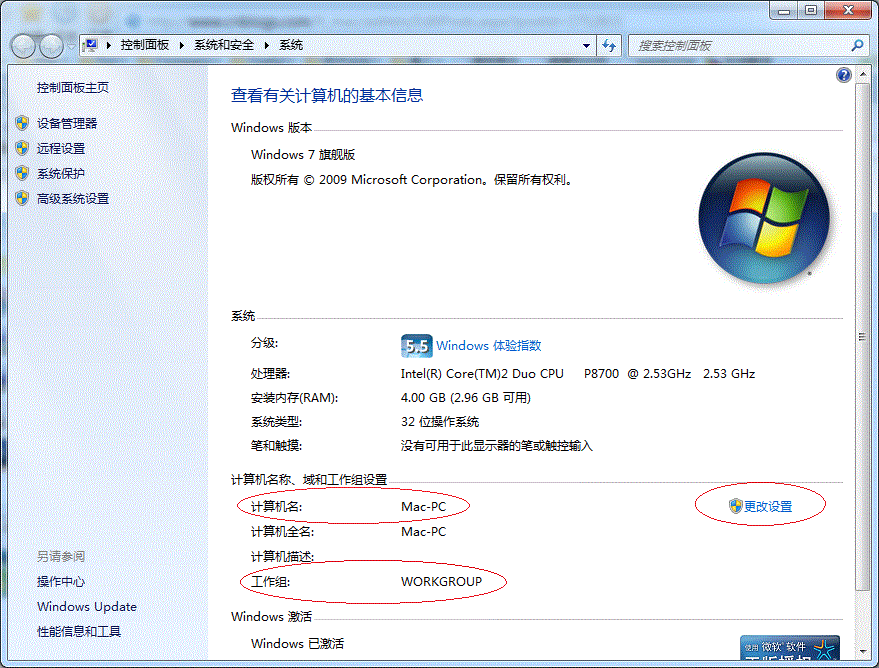
3. If they are in different workgroups, you can configure this in the following window:
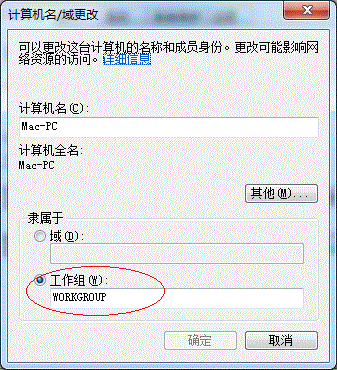
Note: This setting only takes effect after a restart, so remember to restart the computer after changing it.
Step 5: Add the Target Printer on Other Computers
Note: This step is performed on the other computers on the LAN that need to use the shared printer.The process is similar in Windows XP and Windows 7; this article uses Windows 7 as an example.
There are several methods to add the printer; here are two of them.
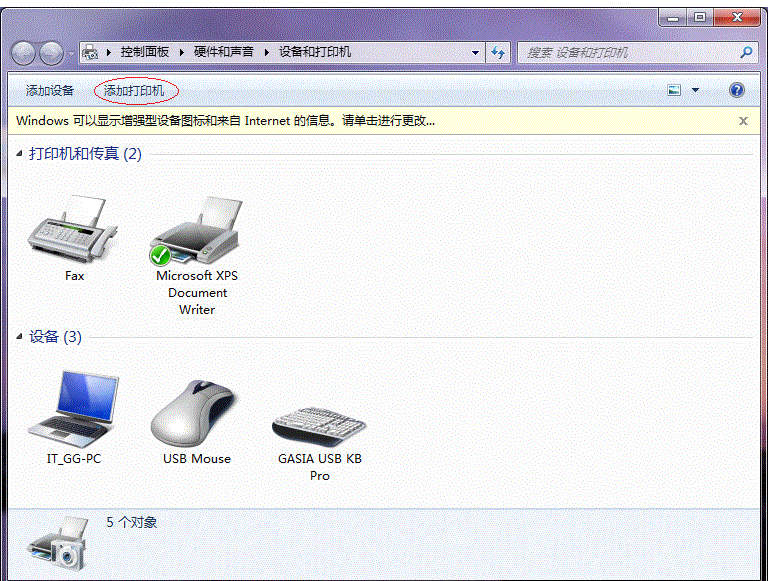
First, regardless of the method, go to [Control Panel], open the [Devices and Printers] window, and click [Add a printer], as shown below:
Next, select [Add a network, wireless or Bluetooth printer] and click [Next], as shown below:
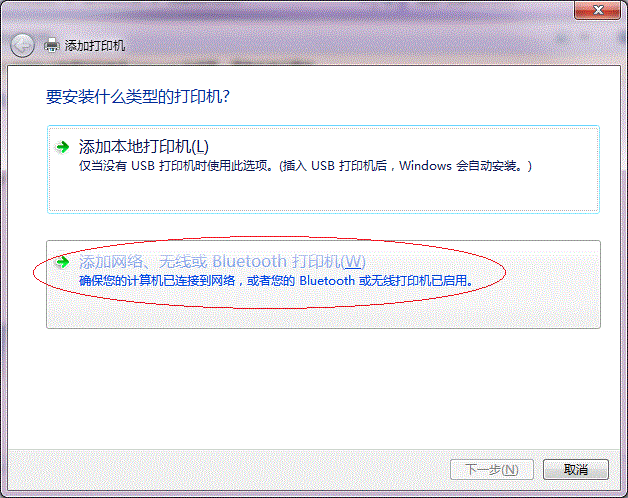
After clicking [Next], the system will automatically search for available printers.
If the previous steps were set up correctly, just be patient, and the system will usually find it. Then simply follow the prompts step by step.
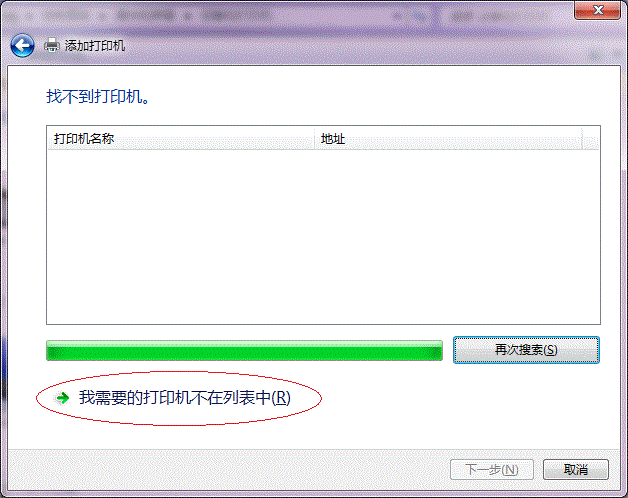
If the system still cannot find the required printer after waiting patiently, don’t worry; you can click [The printer that I want isn’t listed] and then click [Next], as shown below.
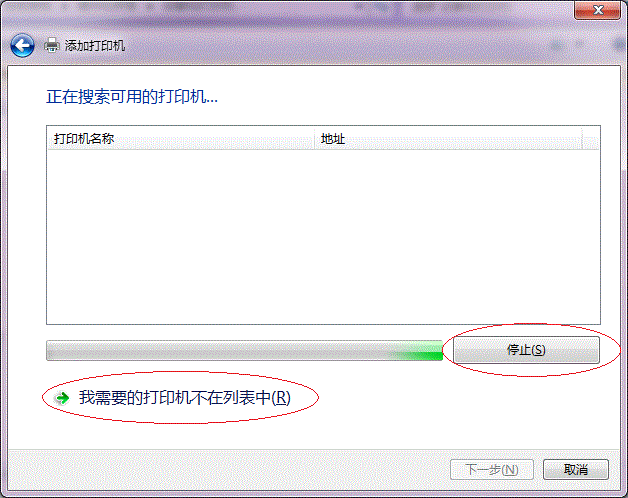
If you lack patience, you can directly click [Stop], then click [The printer that I want isn’t listed], and then click [Next], as shown below:
There are several methods for the next configuration.
Method 1:
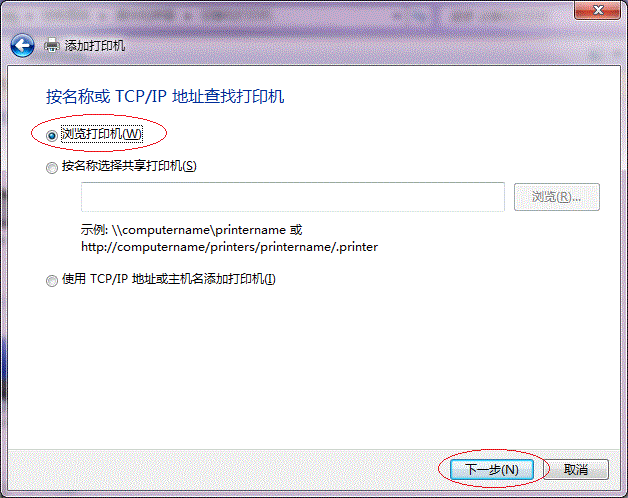
1. Select [Browse for a printer] and click [Next], as shown below:
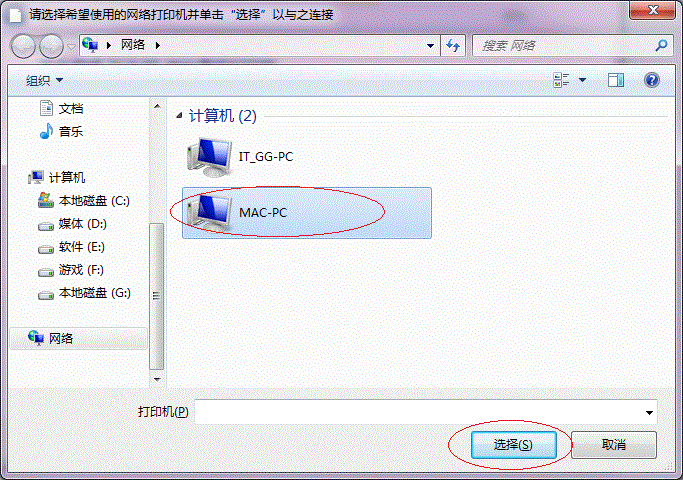
2. Find the computer connected to the printer and click [Select], as shown below:
3. Select the target printer (the printer name is the one set in Step 2) and click [Select], as shown below:
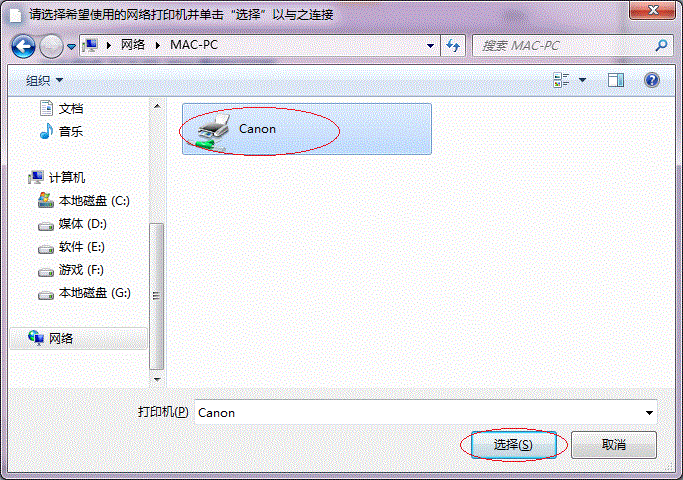
The subsequent steps are simple; the system will automatically find and install the driver for that printer. At this point, the printer has been successfully added.
Method 2:
1. In the [Add Printer] window, select [Select a shared printer by name] and enter “//ComputerName/PrinterName” (both the computer name and printer name were mentioned earlier; friends who are unsure can check Step 2 and Step 4 respectively). If the previous settings are correct, the system will provide a prompt even before you finish typing (as shown below).
Then click [Next].
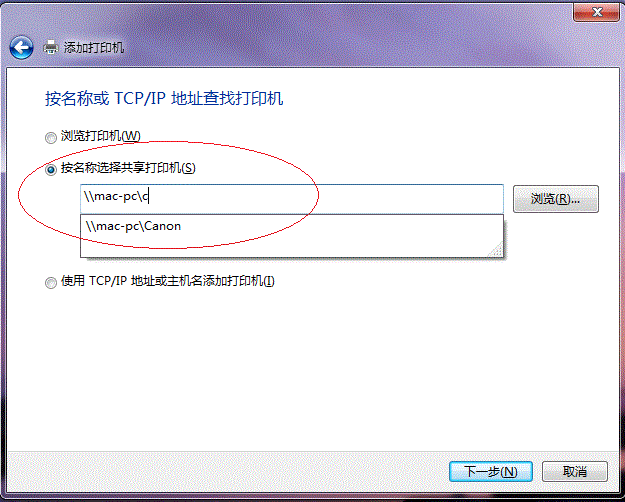
Note: If the system does not automatically give a prompt during this step, it’s very likely that clicking [Next] directly will fail to find the target printer. In that case, we can replace the “ComputerName” with the “IP address”, like this:
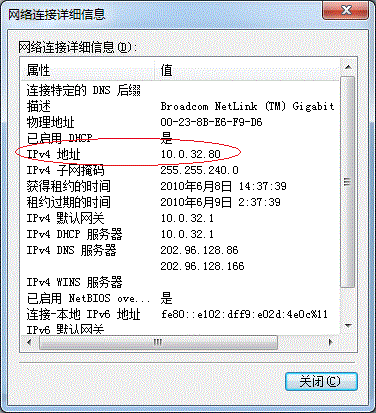
For example, if my IP is 10.0.32.80, I should enter “//10.0.32.80/Canon”. The method to check the system IP is as follows:
1.1 Click the [Network] icon in the system tray and select [Open Network and Sharing Center], as shown below:
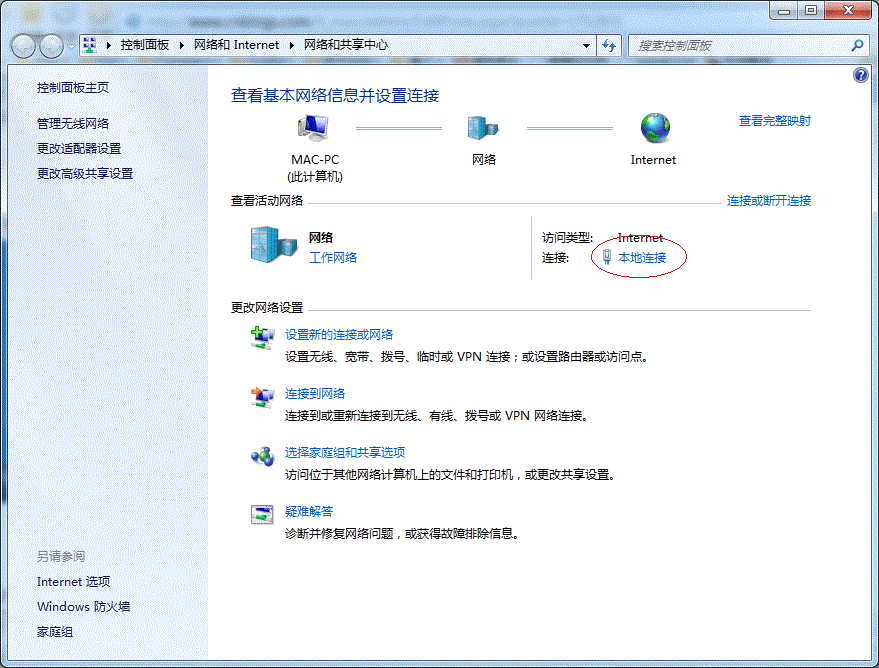
1.2 In the [Network and Sharing Center], find [Local Area Connection] and click it, as shown below:
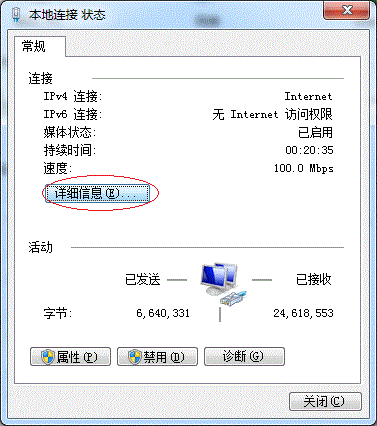
1.3 In the [Local Area Connection Status] window that pops up, click [Details], as shown below:
1.4 The [IPv4 Address] highlighted in the red circle below is the IP address of this machine.
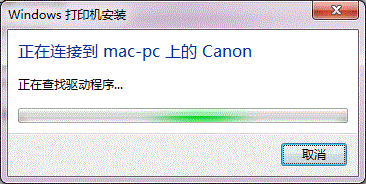
2. Next, continue with the previous steps. Just like Method 1, the system will find the device and install the driver; you just need to wait patiently (as shown below).
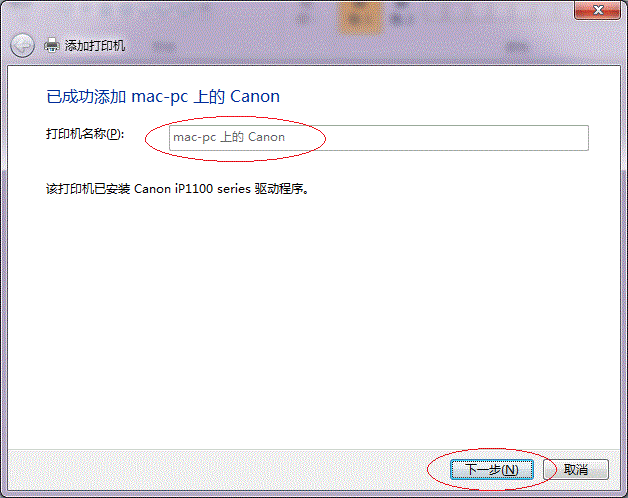
3. Then the system will prompt you that the printer has been successfully added; just click [Next], as shown below:
4. At this point, the printer has been added. If needed, you can click [Print a test page] to check if the printer works properly, or you can directly click [Finish] to exit this window, as shown below:
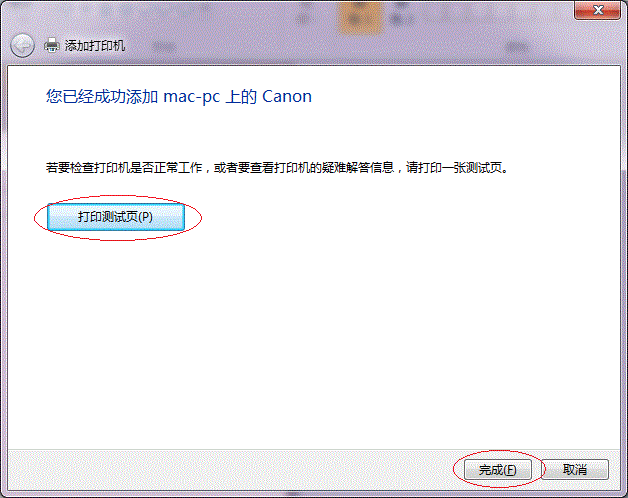
After successful addition, you can see the newly added printer in the [Devices and Printers] window under [Control Panel], as