

If you need to use a graphical interface on a CentOS cloud server—for example, to install Oracle using a GUI—how should you proceed? Today, I’ll share how to install a graphical desktop environment and set up VNC to solve this exact problem.
The installation process may clear your DNS settings, so run the following command before following the steps below:
chattr +i /etc/resolv.conf
1. Installation (I installed packages separately; you can also install them together)
yum install -y tigervnc tigervnc-server
yum groupinstall "Desktop"
yum install gnome-panel
yum install nautilus
2. Set the login password (run the command below; you will need to enter the password twice)
vncpasswd
Enter and confirm the password, then press Enter.
3. Configuration. To prevent a black screen, scroll to the bottom and modify as follows:
vi ~/.vnc/xstartup
#!/bin/sh
[ -r /etc/sysconfig/i18n ] && . /etc/sysconfig/i18n
export LANG
export SYSFONT
vncconfig -iconic &
unset SESSION_MANAGER
unset DBUS_SESSION_BUS_ADDRESS
OS=`uname -s`
if [ $OS = 'Linux' ]; then
case "$WINDOWMANAGER" in
*gnome*)
if [ -e /etc/SuSE-release ]; then
PATH=$PATH:/opt/gnome/bin
export PATH
fi
;;
esac
fi
if [ -x /etc/X11/xinit/xinitrc ]; then
exec /etc/X11/xinit/xinitrc
fi
if [ -f /etc/X11/xinit/xinitrc ]; then
exec sh /etc/X11/xinit/xinitrc
fi
[ -r $HOME/.Xresources ] && xrdb $HOME/.Xresources
xsetroot -solid grey
xterm -geometry 80×24+10+10 -ls -title "$VNCDESKTOP Desktop" &
twm &
gnome-session &
Attachment: https://www.cnop.net/uploadfile/2017/0105/20170105055218512.zip
4. Setting the resolution for login users (please create the oracle user yourself if needed):
Edit /etc/sysconfig/vncservers, add the oracle user, scroll to the bottom, and modify the content as follows (run as root):
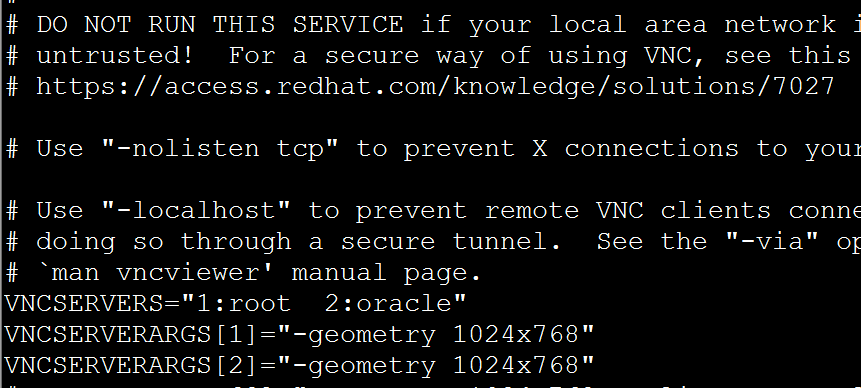
vi /etc/sysconfig/vncservers
VNCSERVERS="1:root 2:oracle"
VNCSERVERARGS[1]="-geometry 1024×768"
VNCSERVERARGS[2]="-geometry 1024×768"
Copy the path from the root user to the oracle user’s home path, and modify the ownership user and group of the path (run as root):
cp -r /root/.vnc ~oracle/.vnc
chown oracle ~oracle/.vnc/
chown oracle.oinstall -R ~oracle/.vnc/
chown oracle ~oracle/.vnc/
chown oracle.oinstall -R ~oracle/.vnc/
# su – oracle # Switch to the previously created oracle user to create the VNC login password
$ vncpasswd # Enter the password twice to complete
5. Starting and Stopping VNC
service vncserver restart/start/stop # Start and stop VNC
6. Client Connection Test
The client software used is: VNC Viewer
(1) Enter the server’s public IP address followed by :1
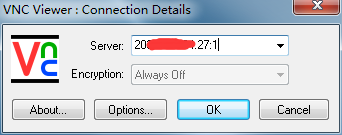
If logging in with the oracle user, append “:2" after the IP, as follows:
192.168.0.200:2
(2) Enter the login password set with vncpasswd
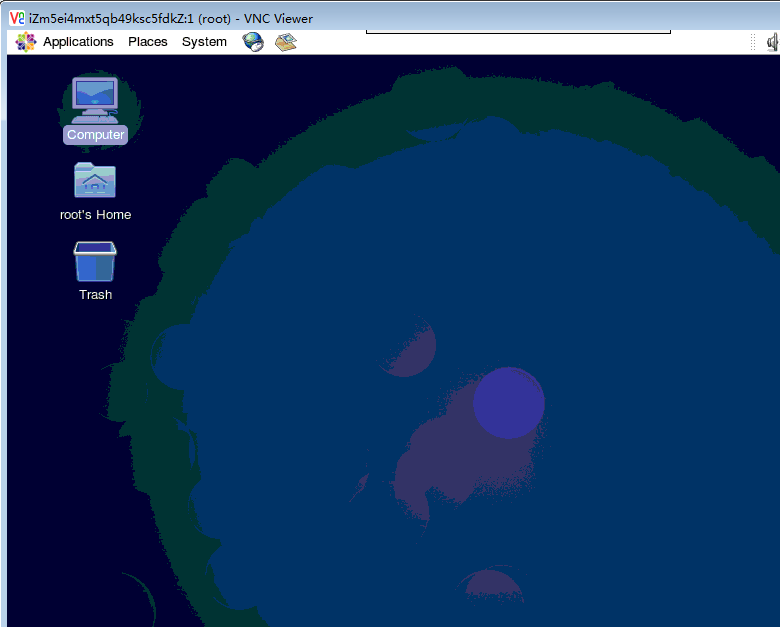
(3) Interface after a successful connection
Reference articles:
http://bbs.qcloud.com/thread-3331-1-1.html
http://blog.sina.com.cn/s/blog_4a0a14170100f5lo.html