This tutorial will guide you through installing the Memcache caching service on CentOS. Memcache is an in-memory caching plugin compatible with PHP. It can not only cache objects like variables but also work with MySQL to cache data queries. Because Memcache stores data in memory, its read and write speeds are extremely fast, providing high-speed caching for large, rapidly changing dynamic data.
Since compiling and installing Memcache involves relatively complex steps, this article will use the direct yum installation method on CentOS as an example, which is quick and simple.
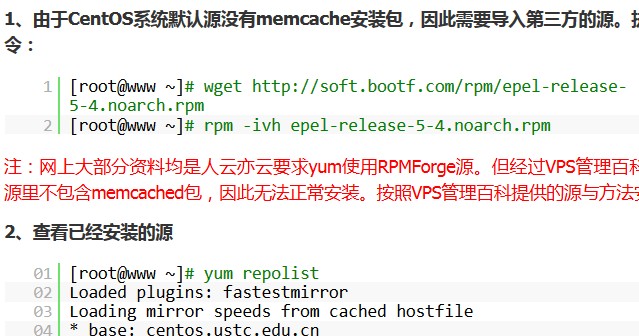
1. Since the default CentOS repositories do not contain a memcache installation package, you need to import a third-party repository. Execute the following two commands:
Note: Most online resources parrot the advice to use the RPMForge repository with yum. However, through actual testing by the VPS Management Encyclopedia, this repository does not contain the memcached package, so it cannot be installed normally. Follow the repository and method provided by the VPS Management Encyclopedia for successful installation.
2. Check the installed repositories
02 |
Loaded plugins: fastestmirror |
03 |
Loading mirror speeds from cached hostfile |
04 |
* base: centos.ustc.edu.cn |
05 |
* epel: mirrors.ustc.edu.cn |
06 |
* extras: centos.ustc.edu.cn |
07 |
* rpmforge: fr2.rpmfind.net |
08 |
* updates: centos.ustc.edu.cn |
09 |
repo id repo name status |
10 |
base CentOS-5 - Base 2,705 |
11 |
epel Extra Packages for Enterprise Linux 5 - i386 5,579 |
12 |
extras CentOS-5 - Extras 282 |
13 |
updates CentOS-5 - Updates 455 |
Finding the epel package indicates a successful installation.
3. Install Memcache server and PHP extension with yum
Both packages should now install normally without any “not found” errors.
4. After successful installation, check if PHP has loaded the memcache module correctly:
Returning “memcache” indicates it has been installed.
5. Set the memcached service to start automatically on boot
6. Start the memcached service and restart Apache
2 |
Starting memcached: [OK] |
7. Test if PHP supports Memcache normally
Create a memcache.php file in the Apache website root directory
The content is as follows:
2 |
$memcache = new Memcache(); |
3 |
$memcache->connect('127.0.0.1', 11211); |
4 |
$memcache->set('key', 'Memcache test successful!', 0, 60); |
5 |
$result = $memcache->get('key'); |
If everything is normal, visiting this page should return “Memcache test successful”. At this point, Memcached and the PHP memcache extension have been successfully installed.
The default port for Memcached is 11211, so use this port in your PHP code. Below is a convenient method to clear all cache content from memcache:
Execute:
Then enter:
That’s it.
Source: http://www.bootf.com/442.html

