There are many clients capable of mounting WebDAV, such as rclone, Cyberduck, and others. However, these are all third-party clients. Today, let’s look at how to mount WebDAV using the built-in client in the Windows operating system.
Taking Windows 11 as an example, when we open “My PC”, we can right-click to “Add a network location” and then add a WebDAV connection, as shown in the image below: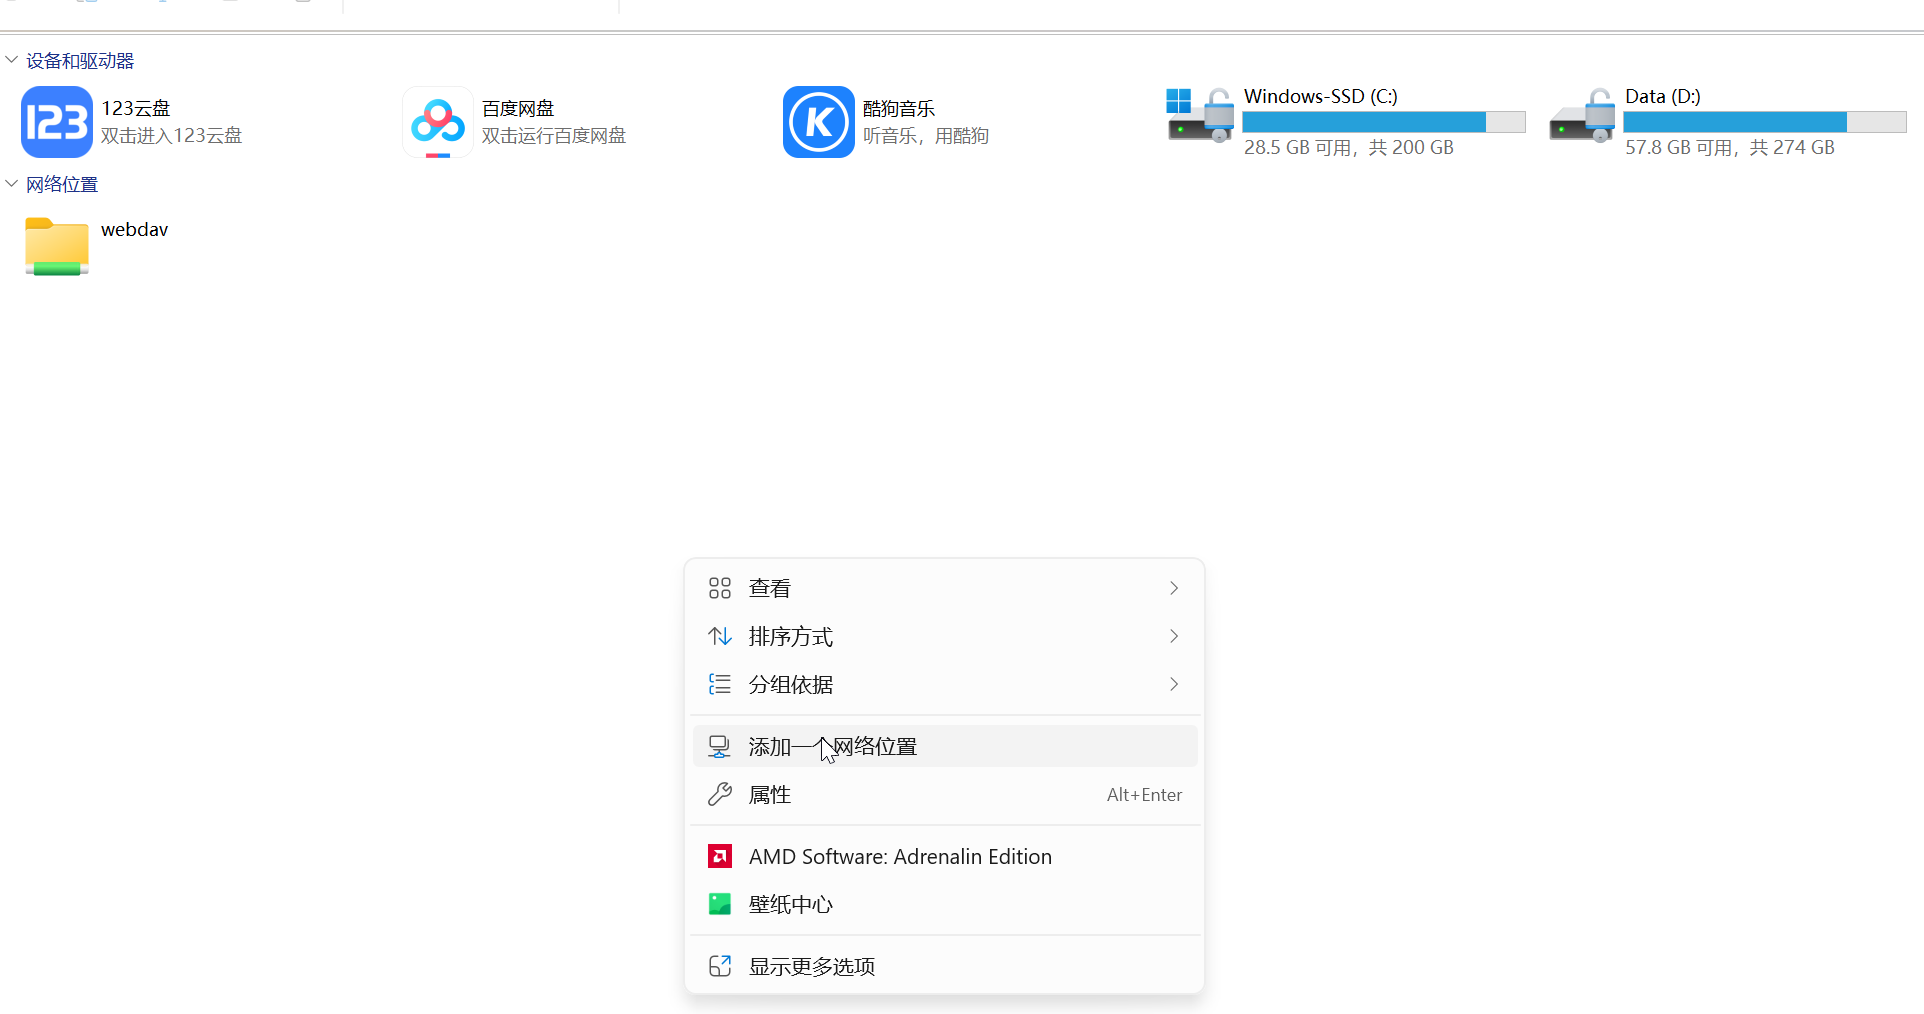
However, note that we can only add WebDAV connections over HTTPS here. If the WebDAV server you set up does not have a security certificate, adding it this way will result in an error.
So how do we solve the problem of mounting WebDAV over HTTP?
1. We need to modify the computer’s registry to enable support for the HTTP protocol. Type “regedit” in the Run box to open the Registry Editor window:
Navigate to: Computer\HKEY_LOCAL_MACHINE\SYSTEM\CurrentControlSet\Services\WebClient\Parameters
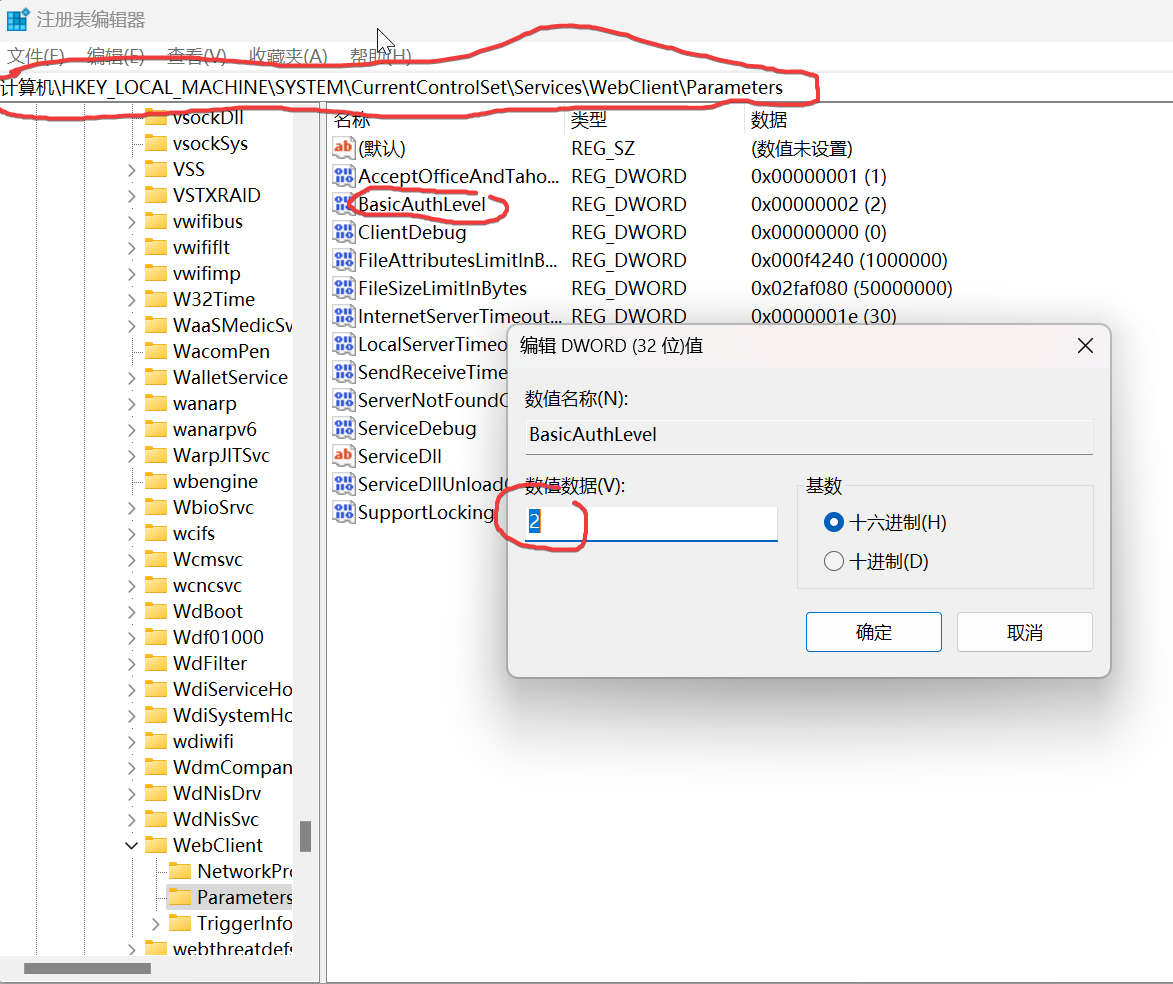
Change the value of “BasicAuthLevel” to “2”.
2. Restart the computer, or type “services.msc” in the Run box.

Right-click “WebClient” and restart it.
Now you can add the WebDAV connection again: