

Installing an SSL certificate on Nginx requires two configuration files: 1_root_bundle.crt and 2_domainname.com.key.
Note: These certificate files are all located in the folder for Nginx.zip.
For example: 1_root_bundle.crt is the root certificate chain (public key), and 2_ domainname.com.key is the private key. (Typically, the certificate public key and private key files are named after your domain name; the certificate file extensions .crt and .cer are identical in nature).
After combining the certificates, proceed with the formal installation.
I. Nginx Installation.
1. Install openssl first.
(1) Extract openssl: tar zxvf openssl-0.9.8k.tar.gz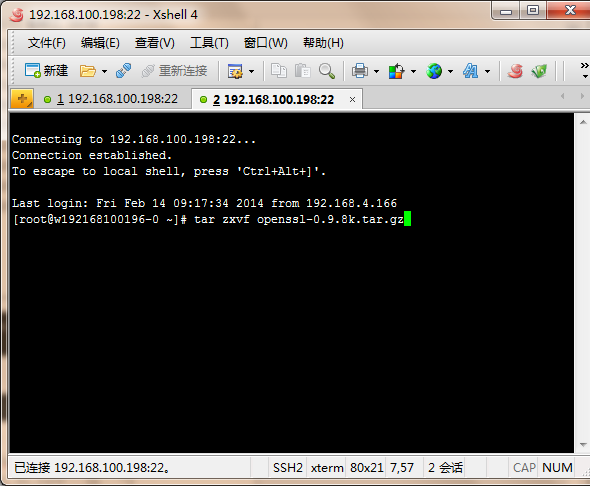
(2) Enter the openssl directory: cd openssl-0.9.8k
(3) Configure openssl: ./config shared zlib make make test make install mv /usr/bin/openssl /usr/bin/openssl.save mv /usr/include/openssl /usr/include/openssl.save mv /usr/lib/libssl.so /libssl.so.save ln -s /usr/local/ssl/bin/openssl /usr/bin/openssl ln -s /usr/local/ssl/include/openssl /usr/include/openssl ln -sv /usr/local/ssl/lib/libssl.so.0.9.8 /usr/lib/libssl.so

2. Install Nginx.
(1) Extract Nginx: tar zxvf nginx-1.4.0.tar.gz
(2) Enter the directory: cd nginx-1.4.0
(3) Configure nginx, for example:
nginx path is: /usr/local/nginx
openssl directory is: /usr/local/openssl-0.9.8k
pcre directory is: /usr/local/pcre-8.31/
The command is:
./configure –prefix=/usr/local/nginx –with-http_stub_status_module –with-openssl=/usr/local/openssl-0.9.8k –with-http_ssl_module –with-pcre=/usr/local/pcre-8.31/
(4) Open the nginx.conf file in the conf directory under the Nginx installation directory
Find:
# HTTPS server
#
#server {
# listen 443;
# server_name localhost;
# ssl on;
# ssl_certificate cert.pem;
# ssl_certificate_key cert.key;
# ssl_session_timeout 5m;
# ssl_protocols SSLv2 SSLv3 TLSv1;
# ssl_ciphers ALL:!ADH:!EXPORT56:RC4+RSA:+HIGH:+MEDIUM:+LOW:+SSLv2:+EXP;
# ssl_prefer_server_ciphers on;
# location / {
# root html;
# index index.html index.htm;
# }
#}
Modify it to :
server {
listen 443;
server_name localhost;
ssl on;
ssl_certificate 1_root_bundle.crt; (Certificate Public Key)
ssl_certificate_key 2_ domainname.com.key; (Certificate Private Key)
ssl_session_timeout 5m;
ssl_protocols SSLv3 TLSv1;
ssl_ciphers HIGH:!ADH:!EXPORT56:RC4+RSA:+MEDIUM;
ssl_prefer_server_ciphers on;
location / {
root html;
index index.html index.htm;
}
}
3. Local Test Access.
If testing locally, set up local DNS resolution: Open the System Drive:/Windows/System32/Drivers/etc/hosts file, edit it with a text editor, and resolve the domain name bound to the certificate to your local ip.
4. Result After Configuration.
Start nginx and visit https:// + the domain name bound to the certificate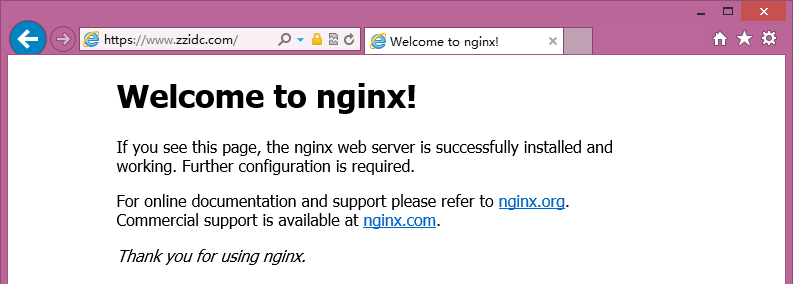
Note: If the website cannot be accessed normally via HTTPS after deployment, check whether port 443 on the server is open or being blocked by website security guards or other acceleration tools.
(1) How to open it: Firewall settings – Exceptions – Add port 443 (TCP).
(2) If blocked by security or acceleration tools, you can add 443 to the trusted list in the interception logs.
After restarting, access via HTTPS again.