

Architecture: mongodb + elasticsearch + graylog + nxlog + collector_sidecar
mongodb: Stores metadata. Generally no additional setup is required after installation.
elasticsearch: Stores logs.
graylog: Web interface responsible for receiving user input data and displaying data from elasticsearch.
nxlog, collector_sidecar: Log collection and transmission.
Please install JDK on your own. Details are omitted here. You can download the relevant version from the following address:
http://mirror.cnop.net/jdk/
1. Install mongodb (using version 3.2 as an example here)
vim /etc/yum.repos.d/mongodb-org-3.2.repo #Add yum repository
[mongodb-org-3.2]
name=MongoDB Repository
baseurl=https://repo.mongodb.org/yum/redhat/$releasever/mongodb-org/3.2/x86_64/
gpgcheck=1
enabled=1
gpgkey=https://www.mongodb.org/static/pgp/server-3.2.asc
yum install mongodb-org
Add system service and start
chkconfig –add mongod
systemctl daemon-reload
/sbin/chkconfig mongod on
systemctl start mongod.service
Note: No MongoDB configuration is done here, including the connection
configuration for graylog. Graylog will create the relevant data automatically when starting up.
2. Elasticsearch Installation
rpm –import https://packages.elastic.co/GPG-KEY-elasticsearch
vim /etc/yum.repos.d/elasticsearch.repo #Add the following
[elasticsearch-2.x]
name=Elasticsearch repository for 2.x packages
baseurl=https://packages.elastic.co/elasticsearch/2.x/centos
gpgcheck=1
gpgkey=https://packages.elastic.co/GPG-KEY-elasticsearch
enabled=1
yum install -y elasticsearch
vim /etc/elasticsearch/elasticsearch.yml
#Modify to your own information. Ensure there are no leading spaces in the uncommented content, otherwise startup may fail.
cluster.name: graylog
# Elasticsearch cluster name. If multiple clusters exist, they can be distinguished by this property.
node.name: node-210 #Cluster node name. Elasticsearch will create it automatically at startup, or it can be configured manually.
network.host: 192.168.0.210 #Set the bound IP address
http.port: 9200 #Set the HTTP port for external services. The default is 9200.
discovery.zen.ping.unicast.hosts: ["192.168.0.210"]
#Set the list of initial master nodes in the cluster. Machines in this array will be automatically discovered and join the cluster. Separate multiple entries with commas.
Add to system service and start:
chkconfig –add elasticsearch
systemctl daemon-reload
systemctl enable elasticsearch.service
systemctl restart elasticsearch.service
3. Graylog Installation (Web Interface)
$ sudo rpm -Uvh https://packages.graylog2.org/repo/packages/graylog-2.3-repository_latest.rpm
#Get the latest version
$ sudo yum install -y graylog-server pwgen
#Install the latest version. pwgen is used for generating encrypted passwords.
Configuration
vi /etc/graylog/server/server.conf
#Configure graylog. Modify the following settings. Leave others as default, or adjust based on your actual situation.
password_secret =ZOauN2D9OknUXUDJbj4Lebb9zPB0SYfgcLELyo7r3yJK5r6Ep6CFfLco4hPy0tc3QEgYIDUP2RZcXdlCpZm43PvuIIyFuWPS
# Salt the password (i.e., append a long random string to the password before encryption), such as md5(md5(password)+salt) and SHA512(SHA512(password)+salt). Use pwgen to generate a random password here: pwgen -N 1 -s 96
root_username = admin #Web interface login username. Uncomment this line.
root_password_sha2 =8d969eef6ecad3c29a3a629280e686cf0c3f5d5a86aff3ca12020c923adc6c92
#Set the web login password. Encrypt it using sha256sum. You can use the command echo -n 123456 | sha256sum to generate it in the system. Here we use 123456 as an example.

root_timezone = +08:00 #Set the timezone
rest_listen_uri = http://192.168.0.210:9000/api/ #Change the address to your own IP. Here we use 192.168.0.210 as an example. This is used to receive heartbeat information sent by Graylog Collector Sidecar; collectors can also access this URI.
rest_transport_uri = http://192.168.0.210:9000/api/
web_listen_uri = http://192.168.0.210:9000/ # Graylog-web access address
elasticsearch_hosts = http://192.168.0.210:9200 #Elasticsearch address, used to connect to the elasticsearch engine.
allow_leading_wildcard_searches = true #Fuzzy wildcard. Recommended to enable, though it consumes more memory.
allow_highlighting = true # (Highlight query results) elasticsearch_shards = 1 (Currently only one elasticsearch installed)
elasticsearch_cluster_name = graylog # Must match the elasticsearch setting
mongodb_uri = mongodb://localhost/graylog # MongoDB server authentication, keep the default. No need to import tables like MySQL; it only stores metadata
$ sudo systemctl start graylog-server
$ sudo systemctl enable graylog-server
Add firewall rules:
firewall-cmd –zone=public –add-port=9000/tcp –permanent
systemctl restart firewalld.service
4. Deploying the Collector Side and nxlog
nxlog:
yum -y install libdbi # Requires libdbi >= 0.8.1
wget http://mirror.cnop.net/nxlog/linux/nxlog-ce-2.9.1716-1_rhel7.x86_64.rpm
rpm -ivh nxlog-ce-2.9.1716-1_rhel7.x86_64.rpm
gpasswd -a nxlog root
chown -R nxlog.nxlog /var/spool/collector-sidecar/nxlog
vim /etc/nxlog.conf # Note: The nxlog user must have read permissions for the log files defined here, otherwise you may not be able to query log information later
########################################
# Modules #
########################################
<Extension gelf>
Module xm_gelf
</Extension>
<Input in>
Module im_file
File "/var/log/messages"
</Input>
<Output out>
Module om_udp
Host 192.168.0.210
Port 12201
OutputType GELF
</Output>
########################################
# Routes #
########################################
<Route r>
Path in => out
</Route>
systemctl restart nxlog
Here is a screenshot of the code above, in case it doesn’t display correctly: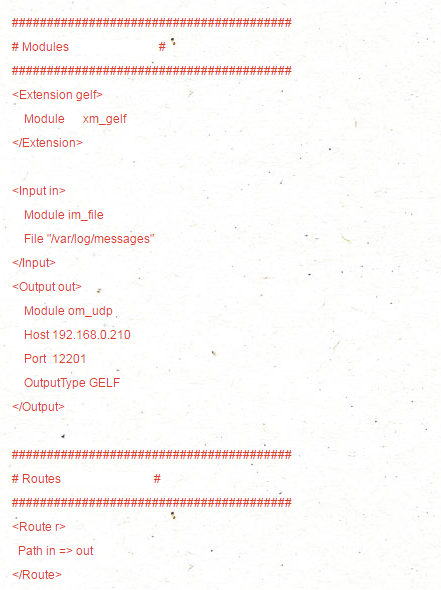
systemctl restart nxlog
Collector: Graylog Collector Sidecar is a lightweight configuration management system for log collection, also known as the backend, running as a daemon process.
wget http://mirror.cnop.net/Graylog/collector-sidecar/collector-sidecar-0.1.4-1.x86_64.rpm
Or download the latest from the official site:
https://github.com/Graylog2/collector-sidecar/releases
$ sudo rpm -ivh collector-sidecar-0.1.4-1.x86_64.rpm
$ sudo graylog-collector-sidecar -service install $ sudo systemctl start collector-sidecar
vim /etc/graylog/collector-sidecar/collector_sidecar.yml # Modify as needed
server_url: http://192.168.0.210:9000/api/
update_interval: 10
tls_skip_verify: false
send_status: true
list_log_files:
node_id: graylog-collector-sidecar # Please change to a different id for multiple machines
collector_id: file:/etc/graylog/collector-sidecar/collector-id
cache_path: /var/cache/graylog/collector-sidecar
log_path: /var/log/graylog/collector-sidecar
log_rotation_time: 86400
log_max_age: 604800
tags:
– nginx
backends:
– name: nxlog
enabled: true
binary_path: /usr/bin/nxlog
configuration_path: /etc/graylog/collector-sidecar/generated/nxlog.conf
systemctl restart collector-sidecar
systemctl enable collector-sidecar
systemctl restart nxlog
/sbin/chkconfig nxlog on
Reference: http://docs.graylog.org/en/2.3/pages/collector_sidecar.html
5. Web Access:
http://192.168.0.210:9000
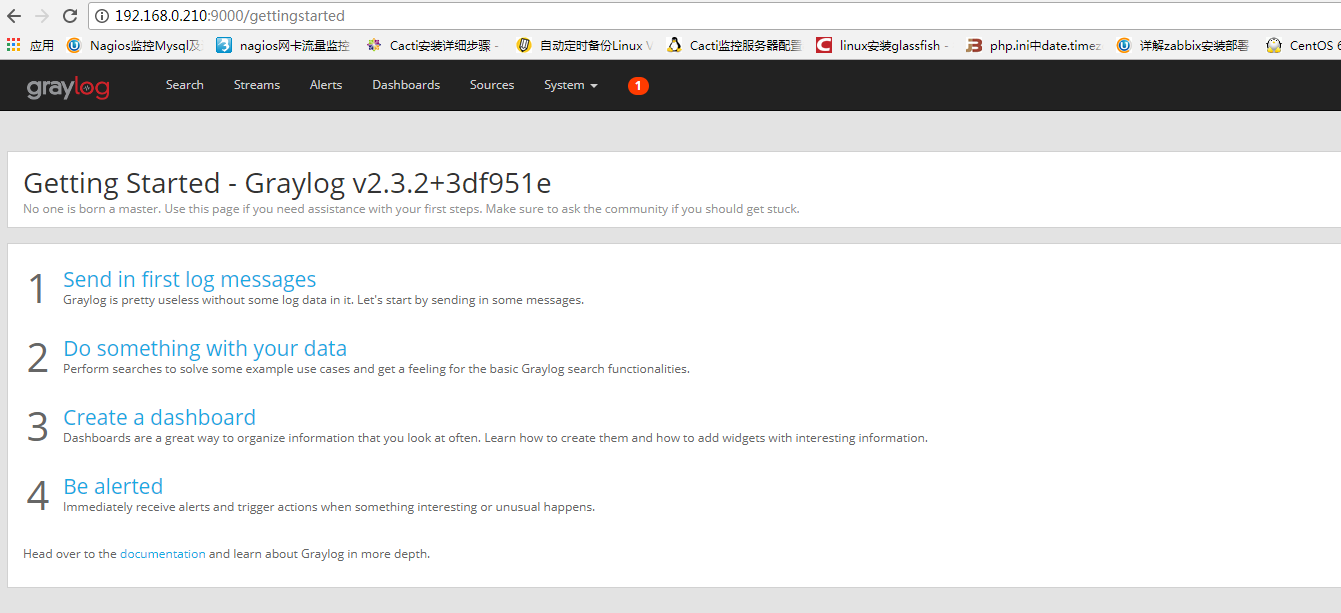
Click System ->Collectors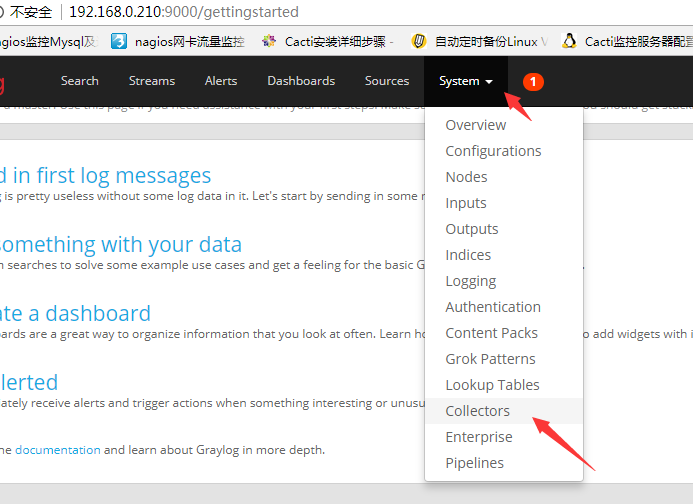
Click Create configuration
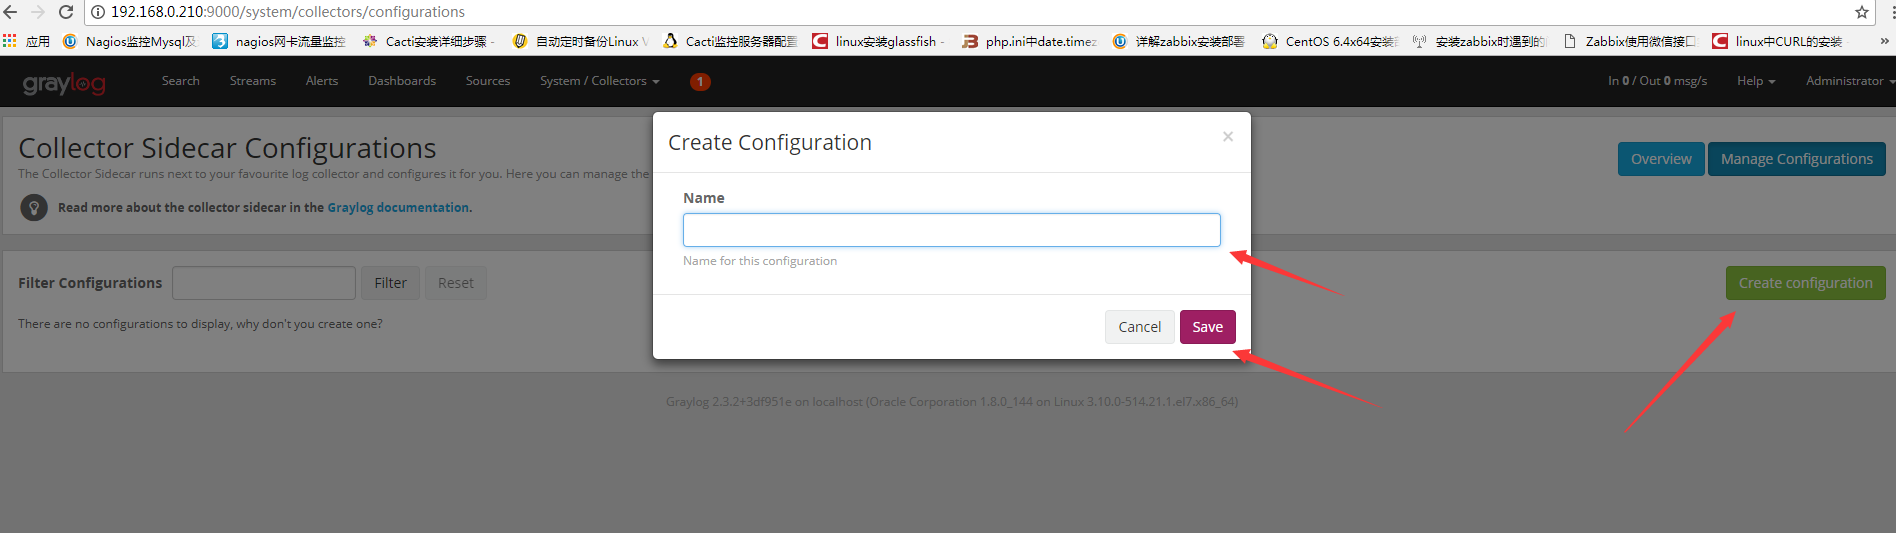
Enter any name here, using “test” as an example:
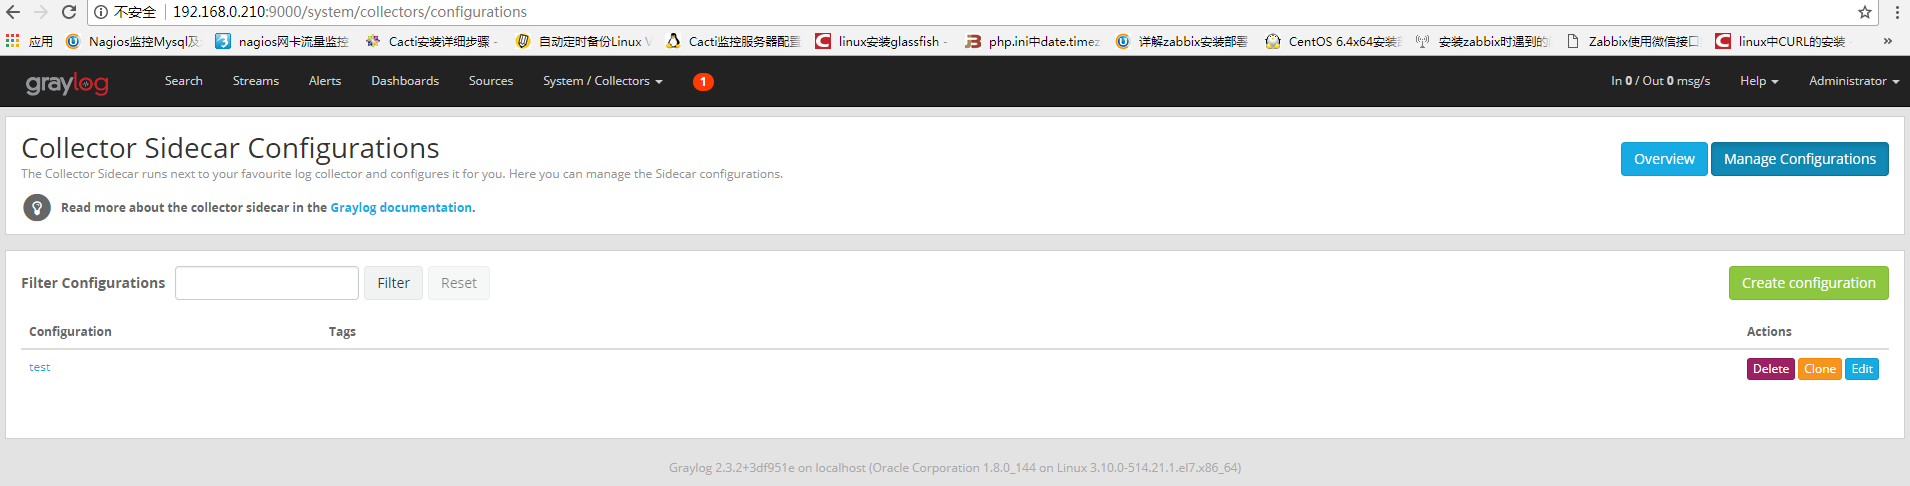
Click the name "test" to enter the configuration interface:
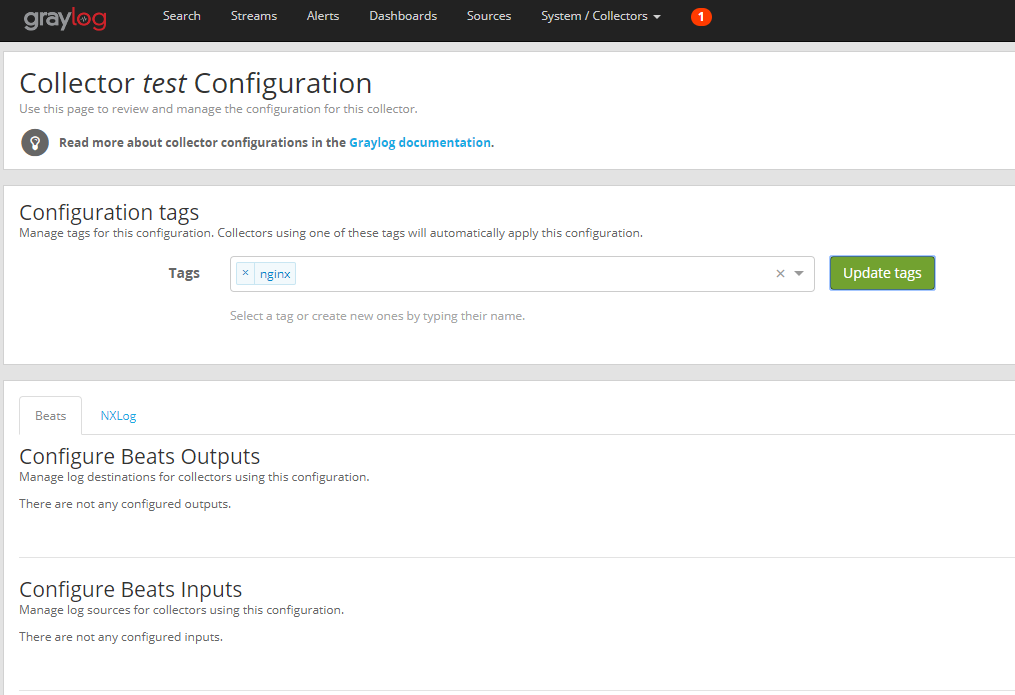
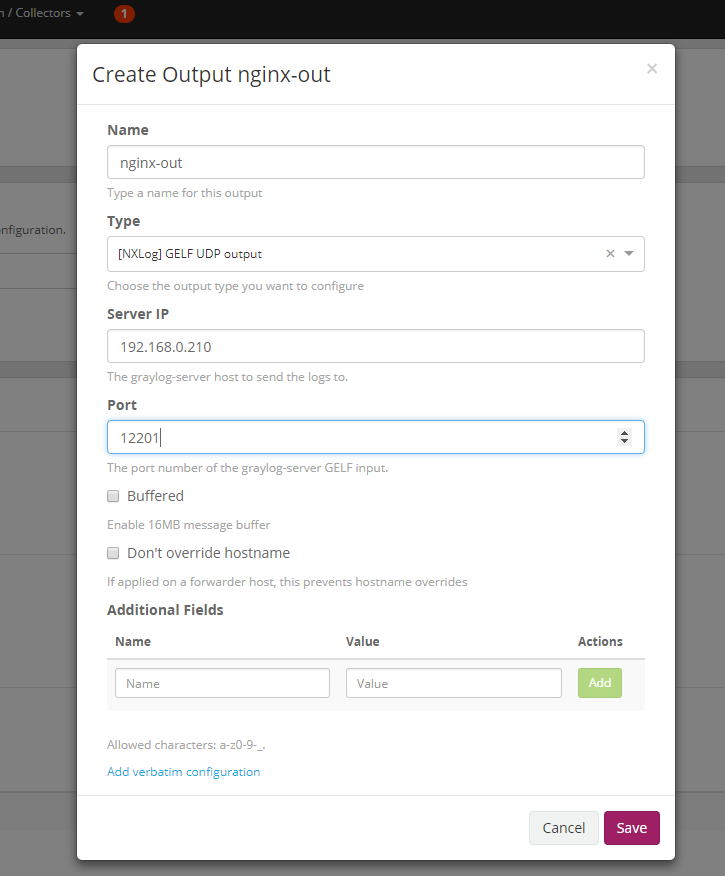
Set the output and input related information, consistent with the nxlog configuration file:
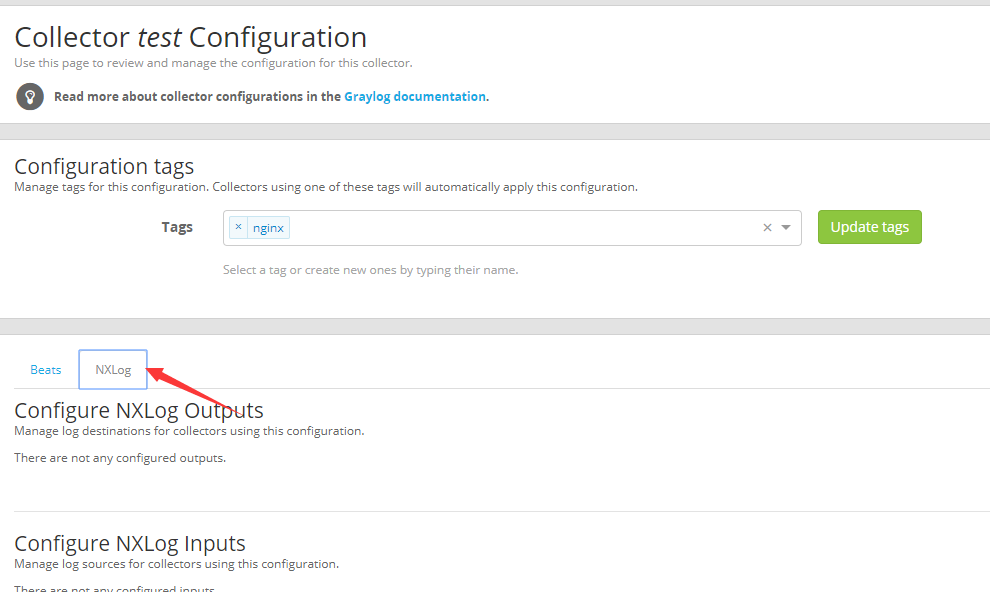
Click Create Output on the right, select the relevant Type, name, IP, port, etc.
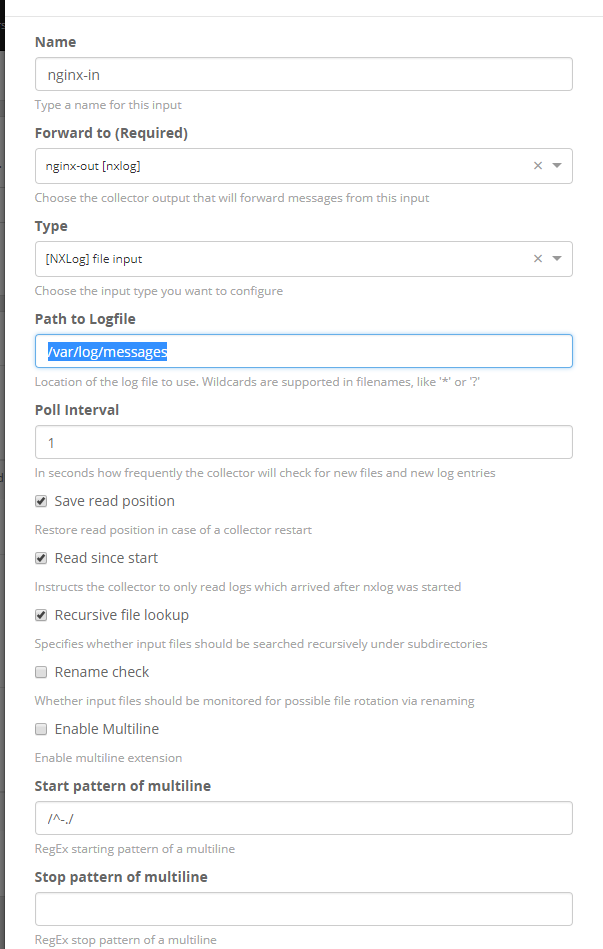
Click Create Input on the right:
Type [NXLog] file input
Path to Logfile /var/log/messages
Restart the collector-sidecar on the client:
systemctl restart collector-sidecar
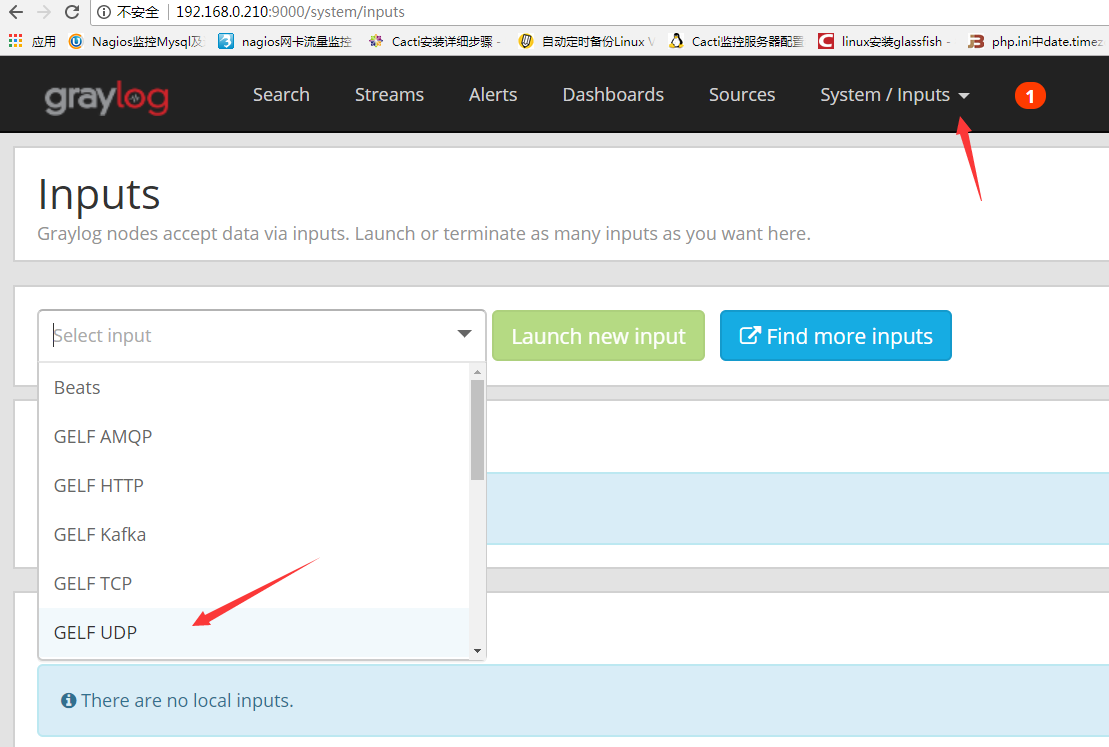
Set up web to receive logs:
system->inputs->Launch new input
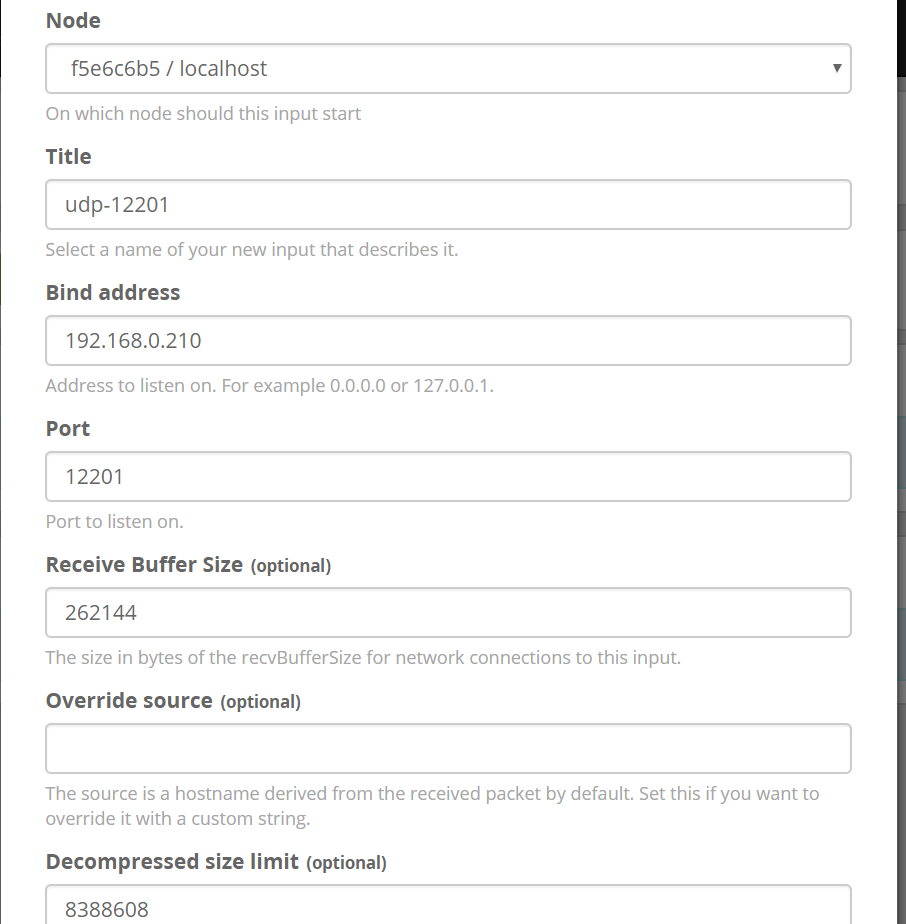
Select host node
Set title
Set IP
Set port (default)
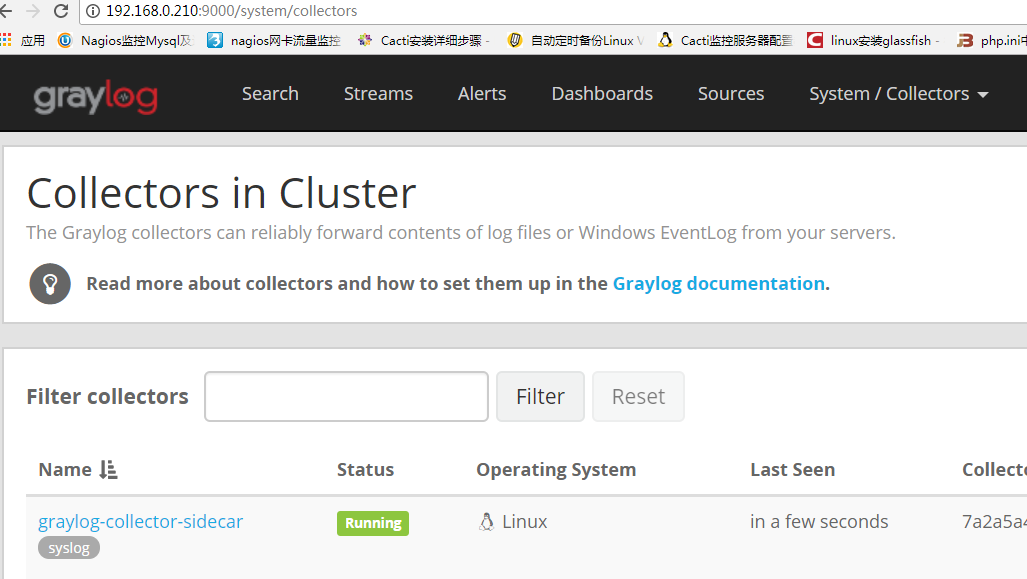
Check if Collectors are running normally in the Graylog web interface:
http://192.168.0.210:9000/system/collectors
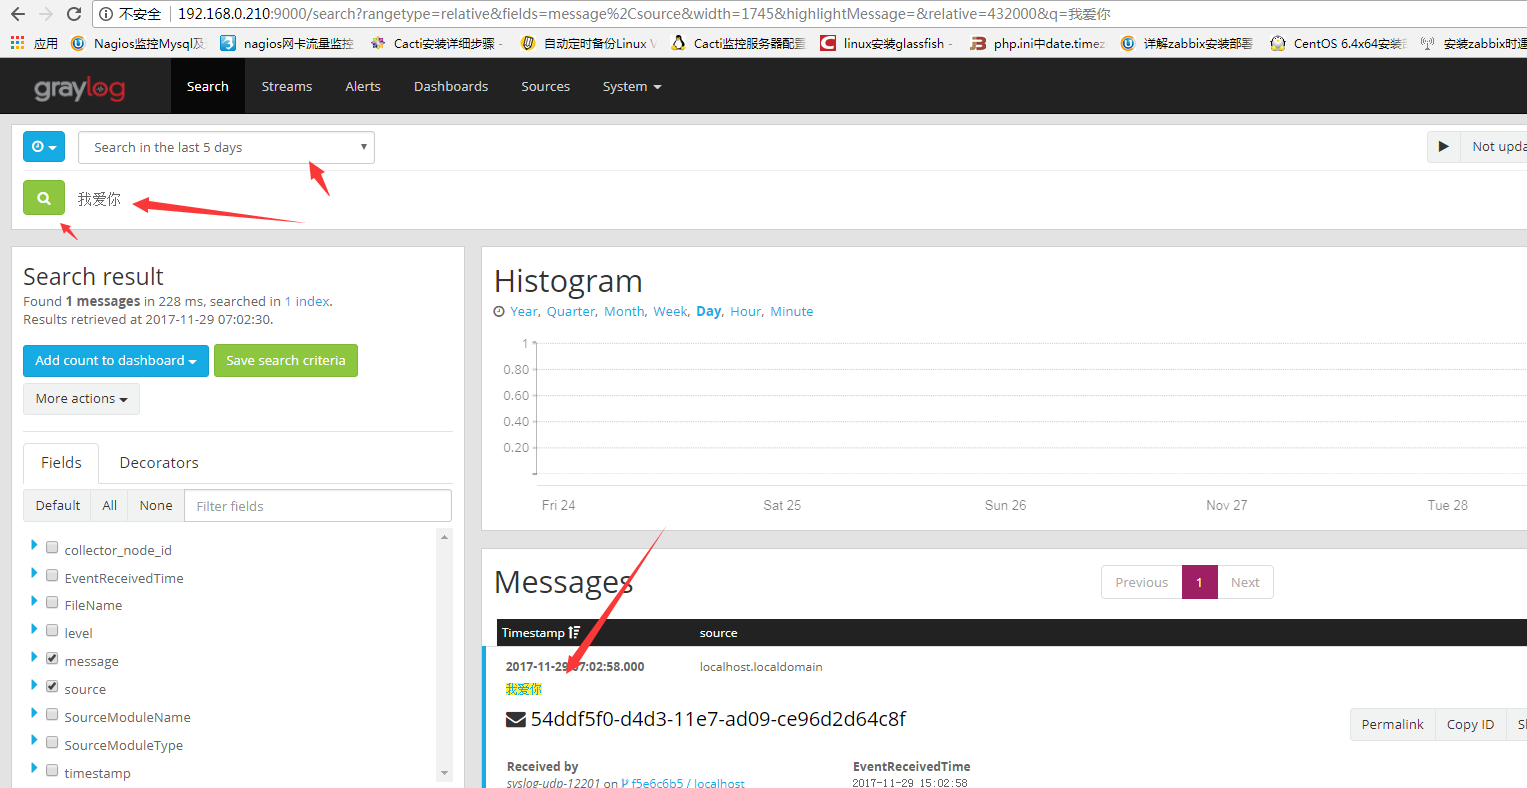
You can manually echo a data entry to the monitored log file, then go back to the main interface to view the log:
Other common issues:
Check nxlog logs:
tail -f /var/log/graylog/collector-sidecar/nxlog.log
Error::
Cause: Please verify if Elasticsearch is running.
Since the above involves code sections, some parts of this page may not display fully. Please refer to the attachments:
https://www.cnop.net/uploadfile/2017/1129/20171129044810559.pdf
https://www.cnop.net/uploadfile/2017/1129/20171129050325594.docx
References:
http://docs.graylog.org/en/2.3/
http://cocojoey.lofter.com/post/1eff2f40_10a6d448
https://www.cnblogs.com/wsl222000/p/6041835.html