

Recently, our department needed to integrate all systems, so the leadership decided to use an OpenLDAP database to achieve unified management of all systems. This required configuring the LDAP service on the server. We chose the OpenLDAP service here. I searched a lot online, but initially failed to configure it successfully. Finally, after multiple attempts, I got it configured. Now I’m making a record for future reference.
Server Environment: CentOS 6.4
Preparation before configuration:
First, disable iptables and SELINUX to avoid errors during the configuration process!
# service iptables stop
# setenforce 0
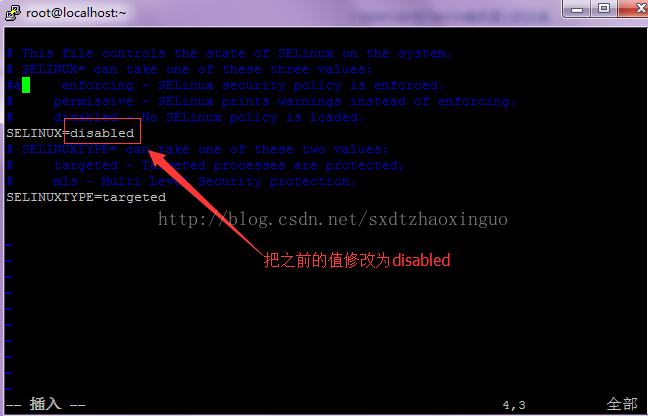
# vi /etc/sysconfig/selinux
Modify SELINUX=disabled, as shown below:
1. OpenLDAP Server Configuration:
(1). Install the OpenLDAP service. I used yum for installation here. The required packages are as follows:
openldap-devel-2.4.23-26.el6.x86_64
openldap-clients-2.4.23-26.el6.x86_64
openldap-2.4.23-26.el6.x86_64
openldap-servers-2.4.23-26.el6.x86_64
(2). The command to install the OpenLDAP service via yum is as follows: (Your Linux machine must be connected to the internet, otherwise the installation will not succeed!)
# yum install openldap-* -y
(3). After installing the OpenLDAP service, copy the LDAP configuration file to the LDAP directory:
# cd /etc/openldap/
# cp /usr/share/openldap-servers/slapd.conf.obsolete slapd.conf
(4). In CentOS 6.4, the main directory has a backup of the configuration file:
# cd /etc/openldap/
# cp slapd.conf slapd.conf.bak
(5). Create the LDAP admin password (using ‘redhat’ as an example here):
# slappasswd
The password I entered here is redhat. After entering the password, it returns a string of encrypted text. Save this to your clipboard first.
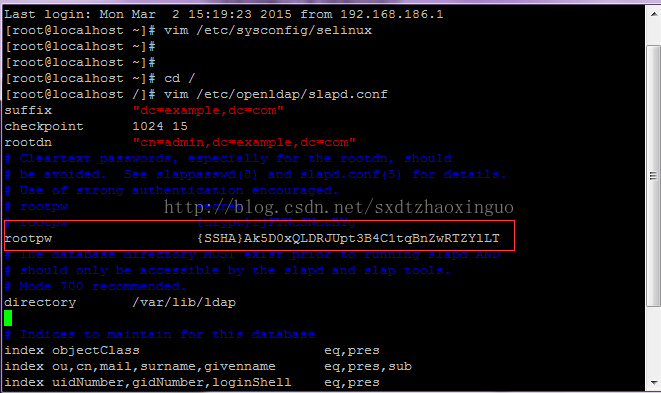
{SSHA}Ak5D0xQLDRJUpt3B4C1tqBnZwRTZYlLT
(6). Edit the configuration file:
# vi /etc/openldap/slapd.conf
Find line 115, the default looks like the image:
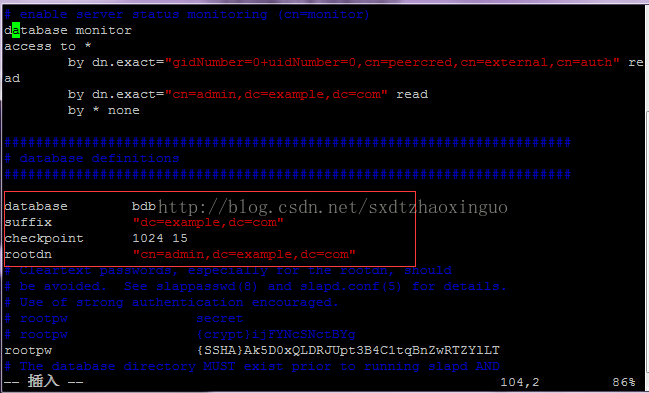
The content in the red box below is the password you just generated (encrypted).
Copy the DB_CONFIG file to the specified directory:
# cp /usr/share/openldap-servers/DB_CONFIG.example /var/lib/ldap/DB_CONFIG
Delete all contents under the default /etc/openldap/slapd.d directory, otherwise errors will occur later when using ldapadd:
# rm -rf /etc/openldap/slapd.d/*
Start the LDAP slapd service and set it to auto-start:
# service slapd restart
# chkconfig slapd on
Grant appropriate permissions to the configuration directory:
# chown -R ldap:ldap /var/lib/ldap
# chown -R ldap:ldap /etc/openldap/
Test and generate the configuration file:
#slaptest -f /etc/openldap/slapd.conf -F /etc/openldap/slapd.d
If it returns “config file testing succeeded”, the configuration is successful.
Grant permissions to the generated configuration file and restart:
# chown -R ldap:ldap /etc/openldap/slapd.d
# service slapd restart
At this point, these users are only users existing on the system (stored in /etc/passwd and /etc/shadow), not in the LDAP database yet. So we need to import these users into LDAP.
But LDAP can only recognize files in a specific format, i.e., files with the ldif suffix (which are also text files). Therefore, we cannot use /etc/passwd and /etc/shadow directly. We need the migrationtools utility to convert these two files into a format that LDAP can recognize.
Install and configure migrationtools:
# yum install migrationtools -y
Enter the migrationtool configuration directory:
# cd /usr/share/migrationtools/
First, edit migrate_common.ph:
# vi migrate_common.ph
Find the following content (around line 70):
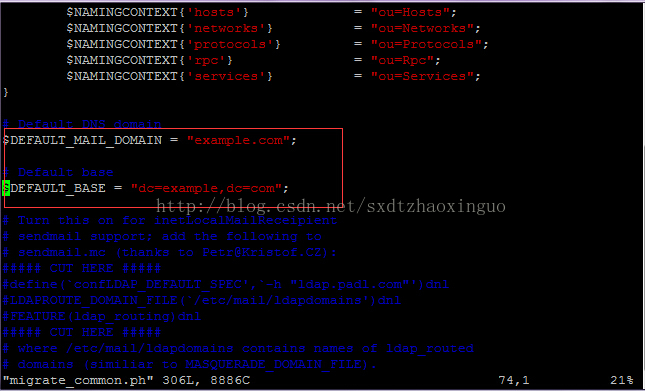
After modifying, save and exit.
Next, use the pl scripts to generate LDAP-readable file formats from /etc/passwd and /etc/shadow, and save them under /tmp/:
# ./migrate_base.pl > /tmp/base.ldif
# ./migrate_passwd.pl /etc/passwd > /tmp/passwd.ldif
# ./migrate_group.pl /etc/group > /tmp/group.ldif
Now we need to import these three files into LDAP, so the LDAP database will have the users we want:
# ldapadd -x -D "cn=admin,dc=example,dc=com" -W -f /tmp/base.ldif
# ldapadd -x -D "cn=admin,dc=example,dc=com" -W -f /tmp/passwd.ldif
# ldapadd -x -D "cn=admin,dc=example,dc=com" -W -f /tmp/group.ldif
When importing, it will prompt for the LDAP password: mine is redhat
If the process completes without errors, the LDAP server configuration is done. Restart slapd to complete the configuration:
# service slapd restart
Connect to the OpenLDAP database using the Softerra LDAP Administrator 2015.1 management tool:
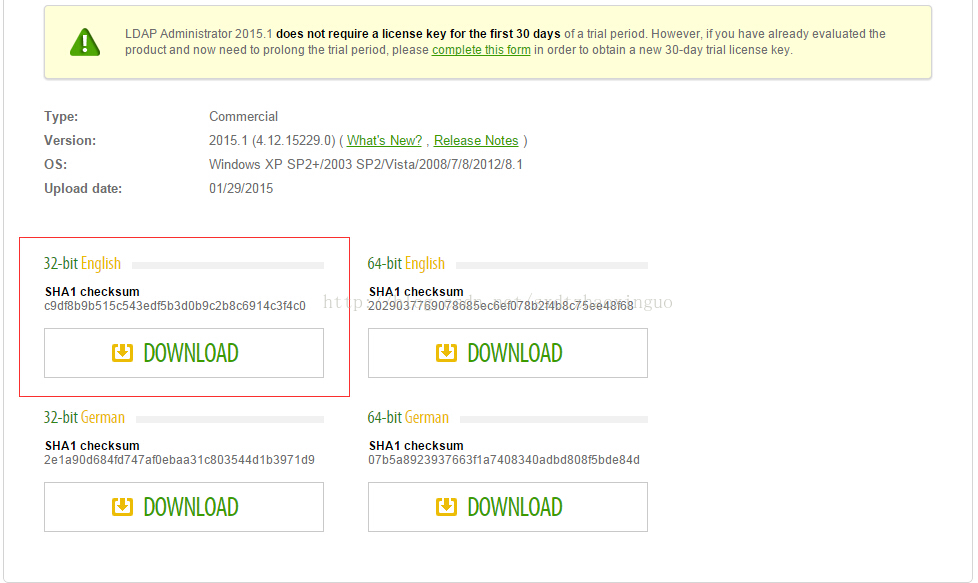
(1). First, download the client software version corresponding to your local machine. I downloaded the 32-bit version here. Download address: http://www.ldapadministrator.com/download.htm, as shown below:
(2). After downloading and installing, you can connect. The connection steps are as follows:
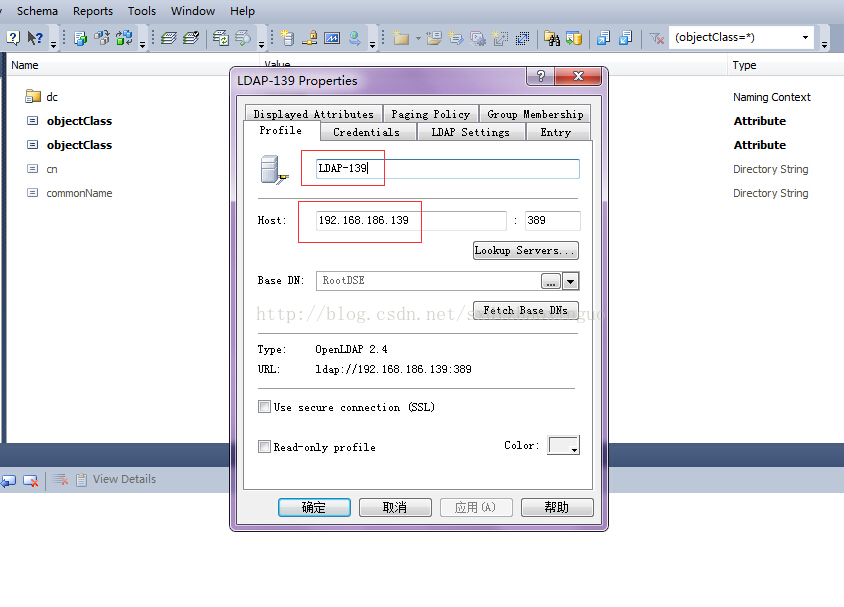
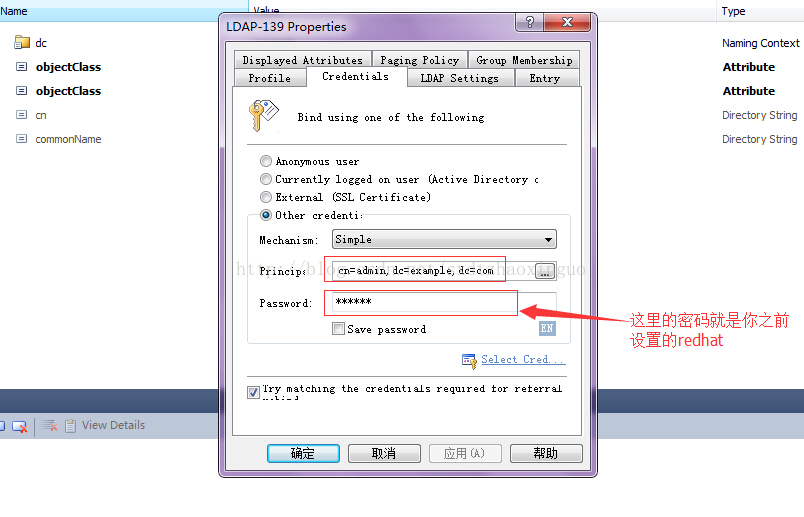
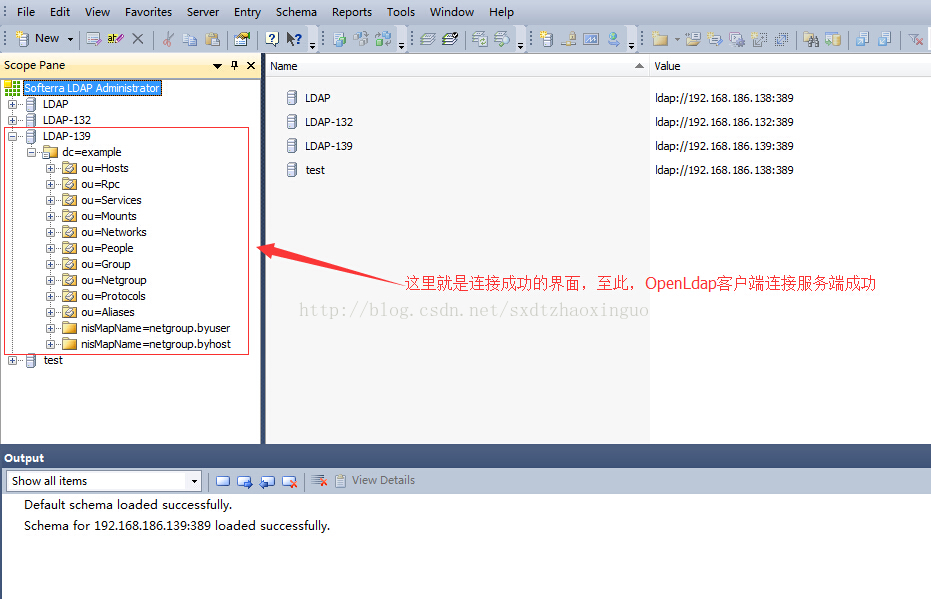
2. Managing via the LDAP admin tool:
Connection properties are as follows:
Base: dc=example,dc=com
Username: cn=admin,dc=example,dc=com
password: set by yourself, here it is redhat
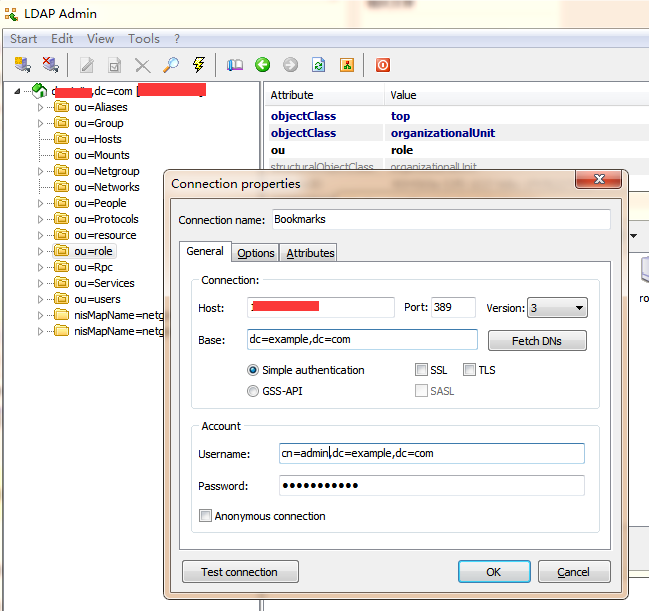
At this point, the OpenLDAP server configuration on Linux and the client connection setup are complete!
Tool attachment: https://mirror.tongshuxia.com/?search=ldapbrowser
Reference article: http://www.centoscn.com/CentosServer/test/2015/0303/4780.html