

Geth is short for the Go Ethereum open-source project. It is a client software written in the Go language that implements the Ethereum protocol, and it is currently the most widely used client with the largest user base. By connecting and interacting with the Ethereum network through the Geth client, you can realize many interesting and practical functions such as account management, contract deployment, and mining.
System Environment: Ubuntu 18 + SSD Drive
add-apt-repository ppa:git-core/ppa
apt-get update
apt-get install -y openjdk-8-jdk unzip make gcc
Note:
1. If using the latest Geth version, try to use the latest Go environment as well to avoid installation errors. Here we use go1.14.2 and geth1.9 as an example;
2. The hard drive must be an SSD or other high-speed cloud disk; do not use a regular SATA drive, otherwise synchronization may never complete;
3. In Fast mode, the current data size (2020-05) is about 220G. As the synced data volume continues to grow, it is recommended to have at least 300G of disk space for installation (for Full mode sync, a 1T or larger drive is recommended). If possible, increase the disk size or use a dynamically scalable cloud disk;
Timezone Adjustment:
timedatectl set-timezone 'Asia/Shanghai'
Golang Environment Installation:
wget http://mirror.cnop.net/go/go1.14.2.linux-amd64.tar.gz
tar zxvf go1.14.2.linux-amd64.tar.gz && mv go /usr/local/
Add environment variables:
vi /etc/profile
export GOROOT=/usr/local/go
export PATH=$PATH:$GOROOT/bin
Apply immediately:
source /etc/profile
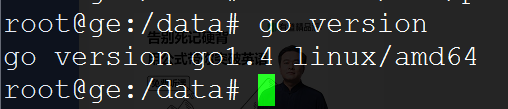
Check version:
go version
Geth Installation:
mkdir /data && cd /data
wget http://mirror.cnop.net/geth/v1.9.13.tar.gz
tar zxvf v1.9.13.tar.gz
mv go-ethereum-1.9.13 go-ethereum
cd go-ethereum
make geth
Add environment variables, append at the end:
vi /etc/profile
export PATH=$PATH:/data/go-ethereum/build/bin
Apply immediately:
source /etc/profile
Check version:
geth version
Startup (replace the IP with your own), choose one of the following modes:
Install screen, you can use the -r parameter later to re-enter the sync interface anytime:
apt install screen -y
screen -S geth
Full Mode:
geth -rpc -rpcaddr 0.0.0.0 -rpcport 8585 –allow-insecure-unlock -rpcapi personal,eth,net,web3,admin -datadir /data/chaindata -syncmode full -maxpeers 9999 -cache 1024 >/data/geth.log
Fast Mode:
geth -rpc -rpcaddr 0.0.0.0 -rpcport 8585 –allow-insecure-unlock -rpcapi personal,eth,net,web3,admin -datadir /data/chaindata -syncmode fast -maxpeers 9999 -cache 1024 >/data/geth.log
Full Mode:
Gets the block headers
Gets the block bodies
Verifies every single element from the genesis block onwards
Downloads all block data information
Fast Mode:
Gets the block headers
Gets the block bodies
Does not process any transactions until it syncs to the current block, then takes a snapshot and proceeds with subsequent sync operations like a full node. It downloads recent transactions from the database along the blockchain, which may result in losing historical data. For example, your account address A might have 10 ETH, but if the incoming transaction exists in older historical transactions, this sync mode will not be able to retrieve the transaction details.
Light Mode:
Only retrieves the current state. Verifying elements requires sending corresponding requests to a full node.
Stopping:
screen -r geth # Re-enter the previous sync window.
ctrl+z # Exit. Do not use the kill -9 command to force quit, as it may corrupt the database.
Common Commands
Enter the console:
geth attach http://127