|
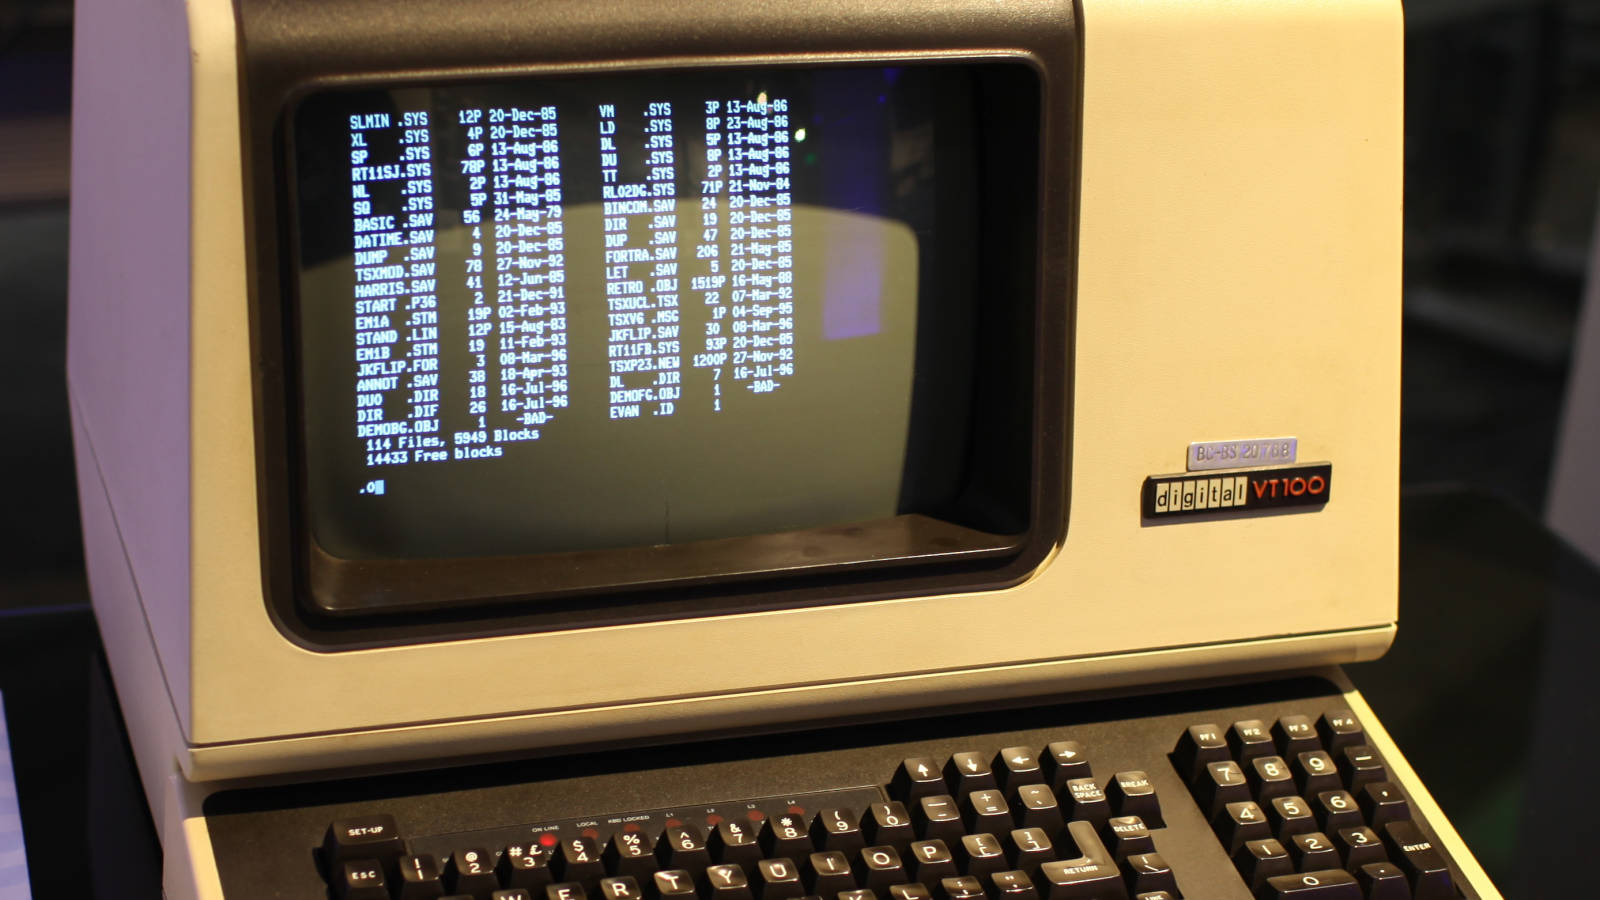
You’ve probably seen it in movies, though you may have never pulled it up on your own computer: a blank screen with some simple text prompts and a cursor, waiting for you to type in a few mysterious commands, and it will do your bidding. This is the command line. It is a character-based interface that predates the windows, icons, and tiles of the mainstream operating systems (from Windows to Mac OS X and Linux) that everyone is familiar with today. The command line is a super-powerful tool for using your computer’s basic functions. For most people, it is also a confusing, incomprehensible, seemingly irrelevant thing. But that’s not the case. Your Computer Under Your CommandTyping character commands and pressing Enter to make the computer do something sounds like a huge step backward compared to swiping and tapping on a mobile device’s touch interface. Even a toddler can use an iPad, right? But if you know how to use them, commands can save you time and reduce frustration. If you are serious about learning programming — or understanding computer technology — you absolutely need to master the command line. Diving into the command line will teach you a great deal about how computers work and how to manage information. You may find that some tasks you normally do with a mouse are actually faster when you type one or two commands. More importantly, you will find it easier to understand programming languages like Python and software like Git, which require a bit of command-line knowledge. Once you are comfortable with the command line, you can break through the barrier that has been holding you back from learning to program. So here is a quick, basic guide to the command line. It primarily focuses on the Unix-like environment of Mac OS X, simply because that is what I am most familiar with. Linux users should already be well-acquainted with the command line, though newcomers may still find these tips useful. If you are on a Chromebook, Google has provided helpful guidance on how to open its built-in command-line tool, which is somewhat similar to Mac or Linux systems. For Windows users, unfortunately, you are limited by a command language derived from MS-DOS that shares only a tiny intersection with Unix, so this guide will not be of much use to you; however, you may want to check out the resources at dosprompt.info. How to Get StartedThe first thing you need to do is figure out how to access the command line, which is typically done through a piece of software called a “shell.” On any Mac running OS X, you need to launch the Terminal application. You can open it through the Finder (it is under Applications > Utilities), or click the magnifying glass in the top-right corner of the screen, type “terminal,” and select it from the dropdown list.
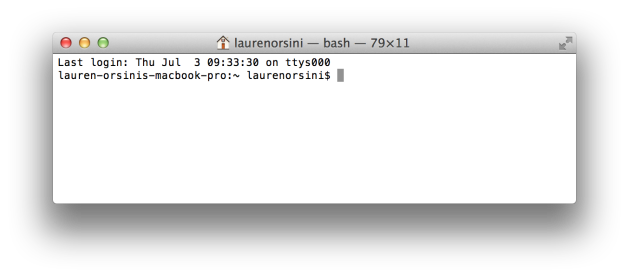
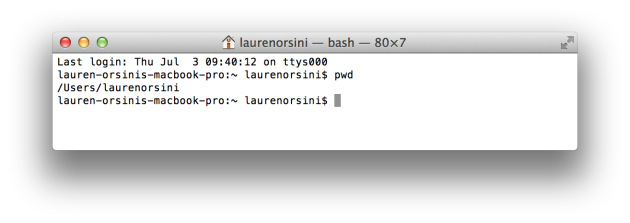
You are in, but all you see is a blank box with an input space. This is the command line! Let’s get to know this window a little better. Type pwd, which stands for “print working directory.” In computer parlance, “printing” something has nothing to do with paper. It simply means spitting something out onto the screen. The result of running this command is that the computer returns the path of the directory you are currently in. (LCTT note: “printing” originates from the fact that early computer output devices were line printers rather than monitors, so output was “printing”; later, when monitors appeared, output on dumb terminals connected to remote hosts was called “echo.”)
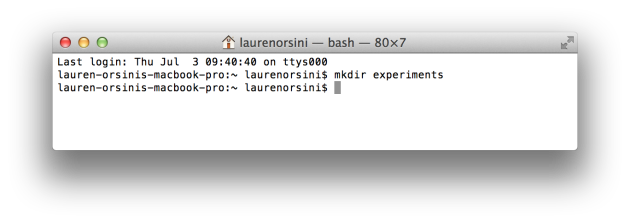
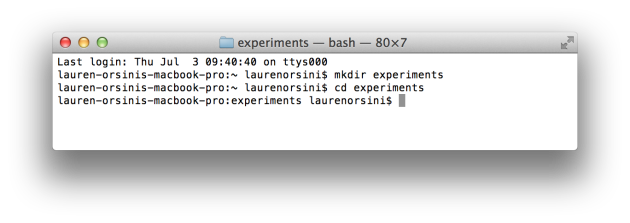
As it happens, /Users/laurenorsini is my home directory. Pro tip: you can use the tilde (~) as shorthand for your home directory — it is the same as /Users/your-username. For example, you can refer to your Downloads directory as ~/Downloads. (If you look closely at the command prompt above, you will see a tilde there. That means I am currently in my home directory.) We certainly don’t want our command-line experiments to clutter up our home directory, so let me create a new directory using the mkdir command. This is the same as creating a new folder in a desktop operating system. Let’s call it “experiments”:
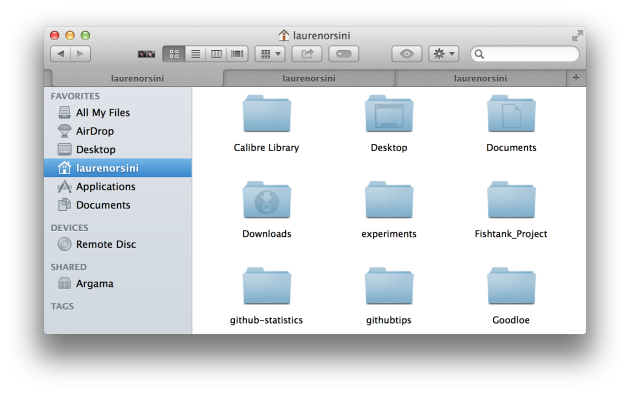
Now we have a new directory. If we were using a graphical interface, we could use our own eyes to confirm that we have created a new folder. Sure enough, if I open Finder and go to my home directory (marked with a little house icon), I will see a folder called “experiments.” I did it through the command line! (And vice versa: you can create a folder in the desktop system and then view it from the command line. These are just two different ways of presenting the same system.)
Now I need to change into the ~/experiments directory using the cd (change directory) command.
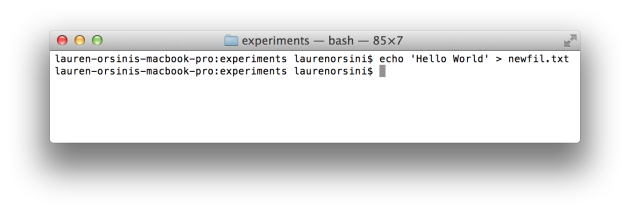
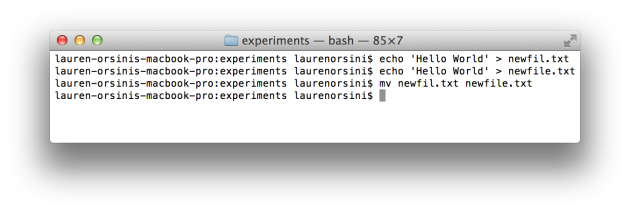
My command prompt is the system default, so it automatically displays my current working directory. But if yours looks different, here’s how to confirm that “experiments” is the current working directory: type pwd again. It should tell you that the current working directory is “experiments.” Creating FilesEvery day when I write code, I create and edit files through the command line. It is faster than using a graphical user interface because I can test my program right in the command line immediately after editing. If I happen to need to push to GitHub at the same time, well, that makes it even more convenient. Now you have a new directory (also called a repository or folder) on your computer to play around with. Let’s start by creating a file that contains the phrase “Hello World.” There are many ways to do this, and here I am using the echo command.
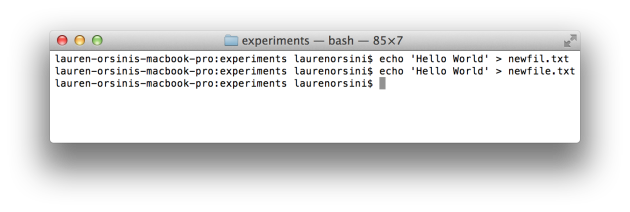
Oh no! I misspelled “newfile.” This happens often. Let’s fix it in two steps. First, I will create a correctly spelled file… (LCTT note: you don’t actually need to create a new file; you can just use mv directly, which is essentially renaming.)
Then, I will use the mv (move) command to replace the misspelled old file with my new file. As usual, the format is “mv oldfile newfile.”
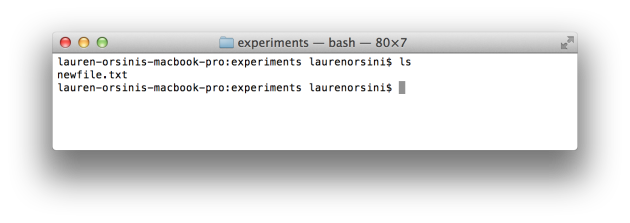
A note about mv: like most commands, it is a deceptively powerful command. When we “move” newfil.txt to newfile.txt, it actually completely overwrites the first file onto the second. So the content I wrote into newfile.txt will be utterly gone, replaced by the content I wrote into newfil.txt. To prove that there is only one file in my directory, I can use ls, the list command, to get a listing of all files in the directory.
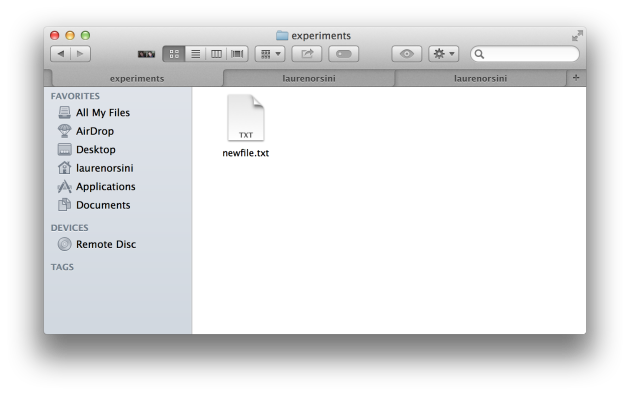
See? Only one. And if I look at this directory in the graphical interface, I can also see this file.
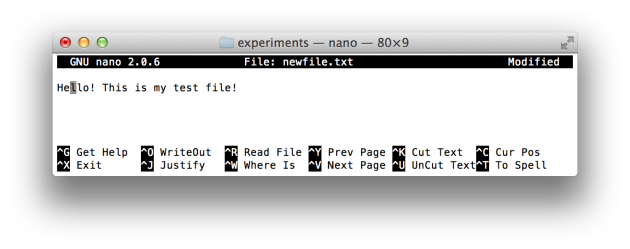
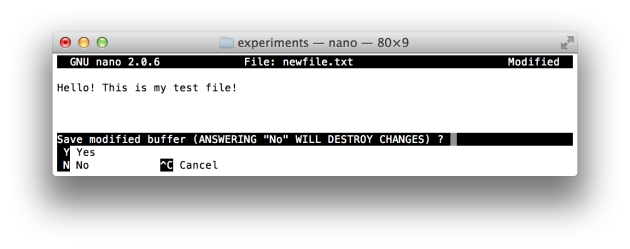
But it is just a plain text file. Let’s use a text editor to put some content into it. On the command line, I like to use the nano editor because it is simple and available on almost all types of computers. (LCTT note: as a Linux enthusiast, you would definitely want to use vi, but vi is a bit difficult for beginners.) This will immediately open an editing screen inside your command-line window. Some basic commands are listed for you.
Write whatever you want to say, then exit with CTRL + X. When it asks if you want to save, type "Y" of course.
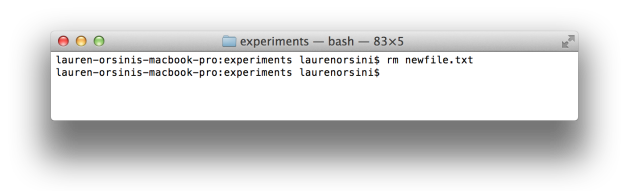
As you might have guessed, you can also use the mouse in the operating system to find the newfile.txt file and see these changes. Here you can open and edit the file you created with any text editor you like. If you want to permanently delete this file, you can use the rm (remove) command:
Be warned: the rm command is extremely powerful! A common trick on hacker forums is to convince a command-line newbie to type rm -rf /, which then deletes every single file on their entire computer. The “/” in the command means the top-level root directory of the computer — everything is beneath it. Never type that command! (LCTT note: we hope you did not actually type rm -rf / before finishing this sentence!!!) Further ReadingThis is just the beginning of the limitless possibilities of the command line. You can use this tool to control every aspect of your computer, which makes it both powerful and dangerous. Make sure to read the command-line prompts before using them, and never blindly type in any statement recommended by a stranger. I have roughly introduced a few commands I commonly use when writing code, but there are far more reasons to master the command line. If you want a more thorough understanding, you might try: The Command Line Crash Course. A free extended course covering the basics of command-line usage. A Command Line Primer for Beginners. Lifehacker’s collection of useful commands suitable for beginners. Introduction to the Mac OS X Command Line. The online education site Treehouse covers the basics of the command line in exhaustive detail. Now that you have finished reading this article, you will find it easier to understand the coding tutorials I have written before, because you simply cannot complete them without typing a few commands. If you are ready, I recommend checking out ReadWrite’s Git tutorial, which uses the command line to introduce you to collaborative programming. May the source be with you! Title image via Jason Scott; other screenshots provided to ReadWrite by Lauren Orsini via: http://readwrite.com/2014/07/18/command-line-tutorial-intro |